Showing posts with label Float Cabin Construction. Show all posts

Thursday, June 18, 2020

#ThrowbackThursday: Two Decades of Float Cabin Maintenance and Improvements

Our cabin at the wall of Hole in the Wall.
You've just seen our float cabin inside and out. This post shares what it has taken to maintain and make improvements over the years to make our off-the-grid cabin a home.

Our float cabin at Hole in the Wall on Powell Lake, BC, was built in 1997 by our good friend John. He has an extraordinary talent for lashing together cedar log floats and building cabins from the waterline up.

We purchased the cabin in 2001, and with John's expert help we've maintained and improved it. He's a Jack of all trades who never ceases to amaze us.

John and our Cabin #3, the third one he built.

Here are some of the projects I've written about since I began blogging in 2006. Follow the links to see the stories.

Floating woodshed in 2007.
Repairing our log boom in 2008.
Adding barrels for extra flotation in 2008 and 2015.
Woodstove blow back solution in 2009.


Wind generator in 2009.
Bathroom and porch addition in 2011.
Indoor plumbing in 2011.
A new coat and colour of paint in 2011.


New propane stove and refrigerator in 2011.
Custom shelves made by John in 2012.
Upgraded ceiling insulation in 2014.
Pine paneling in 2014.


Making a new anchor in 2015.
Float log burning (carefully) for dry rot in 2015.
Solar system upgrades in 2015.
Enlarging our protective log boom in 2016.


A new front deck in 2017.
Xplornet satellite Internet in 2017.
Float cabin anchor repair in 2017.
Renewed floating garden in 2019.


The most recent project was replacing the main deck. John did the whole project for us. He arranged for old growth cedar boards to be cut to specification. The largest load went up on our barge.

The side and front deck.

Main cabin cedar deck replaced in 2020 - Part 1.
Main cabin cedar deck replaced in 2020 - Part 2.

In writing this post, I was amazed at how many projects we completed with John's help over the last two decades. And there's one more big one to come. Once the weather clears, John will repaint the exterior. We like the current pale yellow with forest green trim, so that's what he will use.

If you have any questions, please leave a comment and I'll get back to you. -- Margy

Thursday, June 04, 2020

#ThrowbackThursday: Cabin Finishing Touches

A remote float cabin comes with lots of maintenance and improvement projects. After about a year of making changes to our guest room, bathroom and kitchen, I wanted to add some finishing touches inside.

My plan included new ceiling insulation, painting and pine paneling in the great room downstairs and the loft bedroom. These were jobs for our good friend John. To make it easier on all of us, we scheduled the work while we were away on a trip.  

The walls were stained near windows, doors and the woodstove. To brighten the room, we used white semi-gloss paint under the peak of the roof. John suggested replacing the cedar strips and I quickly agreed.

Before above, after below showing painting of the front wall.

John used rigid plastic panels to cover the ceiling insulation stained due to woodstove moisture. New panels fit between the rafters up to the peak of the roof. The new insulation gave us an attractive ceiling and helped the cabin retain more heat in winter.

Before above, after below showing the new panels for ceiling insulation.

We covered the side and front walls of the great room downstairs with pine paneling. John installed it horizontally on top of the old fiberboard. It was an easier installation, with the added bonus of increased wall insulation.

Pine paneling in the great room from the north to east to south wall.

In my kitchen, I spray water when I use the sink's hand pump to draw water up from the lake. We found a small piece of maroon Arborite (formica) for a backsplash.

Installation of the sink's new Arborite backsplash.

The loft bedroom got pine paneling for a headboard to our king-size bed, made from two twins. Getting a king mattress up the lake in the back of our boat and up the narrow stairs would have been too difficult.

Pine paneling for our king-size bed in the loft bedroom.

The finishing of finishing touch was a new sofa that did come up the lake by boat. It's the only seating in our living room, so it's an important comfort and decorative feature.

And a tribute to our beloved Stick Tail who lived to 23 years.

Thanks for visiting my #ThrowbackTursday posts about float cabin living. Next week I'll share a YouTube video about our float cabin home created by Kirsten Dirksen. -- Margy

Monday, May 25, 2020

Available Online "Cabin Number 5" by Wayne J. Lutz

You've just been reading a series of posts about our float cabin on Powell Lake. It was built almost single handedly by our good friend John. He took several years off after building our cabin, but the dream of a new one for himself was strong.

Cabin Number 5
Coastal BC Stories

Cabin Number 5 is the nineth book in the Coastal BC Stories series by Wayne J. Lutz. In it he follows along as John constructs his new float cabin from the water up. John purchased massive cedar logs and cabled them together into the floating foundation. Over the months and years, when time and money were available, the cabin grew board by board. If you've ever dreamed of living in an off-the-grid cabin, or wanted to build one for yourself, you'll enjoy reading Cabin Number 5 (yes, it's the fifth one John has built or remodeled).

Go to PowellRiverBooks.com for ordering information.

Print for $9.95
Kindle for $2.99 
Kobo for $2.99 
Smashwords for $2.99 

Also available at other online bookstores.

Thursday, May 07, 2020

#ThrowbackThursday: Float Cabin Tour - Cabin Floor Plan

The living room side of the greatroom.
Before I proceed with the video tour inside our float cabin home, here's an overview.

Our cabin is the third John built, so it's called Cabin #3. It's small enough (675 sqft) to easily maintain but large enough not to be cramped.
First Floor

The first floor has the most living space (500 sqft). There are two small bedrooms (7'x10'), one for guests (which we rarely get) and one for storage. We keep a week's supply of firewood (Wood Storage Shelf Construction) in the guest room. That's especially handy in winter.

Sink with hand pump and propane fridge.
Downstairs is greatroom style. The kitchen with propane appliances is on one side and the living room with a woodstove on the other. We have a portable TV for Internet streaming. It's compact and functional.

Compost toilet, tub and storage.
In 2011 we added an indoor bathroom off the guest room to replace our outhouse four flights of stairs up the granite cliff. This one change to our cabin made full-time living much easier.


Second Floor

The loft master bedroom with a king bed and view.
The second floor is a sleeping loft. Two twin beds together make a king. The loft and high ceiling over the living room make the cabin feel spacious. A window high on the opposite wall gives us a captivating view of Goat Island.


If we had more space it would feel like work to keep it clean and maintained. If you are planning on building or purchasing a cabin, think about that. Bigger isn't always better.

Come back next week for the next installment of the video tour. See all that we can do in a kitchen with just 130 square feet. -- Margy

Saturday, January 18, 2020

Float Cabin Deck Replacement Part 1

Spring 2018 before pressure washing.
My last post was about major maintenance and improvement projects we've done at the float cabin over the last two decades. I left off our most recent one so you can see it in perspective.

Just like any home, it's only as good as the foundation.

After removing the stain aging was evident.
Over the last 22 years, time and weather have taken their toll.

Periodically, we've replaced individual boards and a few supports to extend the life of our foundation and deck, but in 2019 it was evident that we needed to do much more.

Our float cabin's raft during construction.
But first, a little history. Our cabin floats on a lashed together raft of 40-foot cedar logs. Cedar is durable and buoyant. Floats do get waterlogged, but adding plastic barrels underneath gives increased flotation. The best news, our cedar logs are in good shape.

Crosswise logs and steel cables secure the float logs together. On top, pony walls of vertical then horizontal 2x4s are nailed into the cross-member logs. This provides a level platform for the cabin and deck.

The pony walls are then added to the float log foundation.

Vertical 2X6" boards are nailed on top of the pony walls. Throughout this process, everything is double-checked to make sure it's level.

To support the deck boards, vertical 2x6s are nailed on top of the pony walls.

Yellow cedar is best for decking. Next is old growth red cedar. Last is second growth cedar. Most of our foundation was yellow cedar, but a few spots included second growth wood.

A second growth cedar log on top was replaced with an old growth cedar beam.

Our good friend John (and cabin's builder) replaced our deck. When he took off the old boards, he discovered several supports that needed replacing. In particular, a second growth log was rotten. He chose to replace all 40-feet with milled 6X6" beams.

Here are some related cabin construction posts:

Float construction
Extra Flotation Power
Pumped
Log Burning for Dry Rot
Cable Up - Anchoring System

In Part 2 I'll tell more about the deck replacement process. -- Margy

Thursday, January 16, 2020

Float Cabin Deck Replacement Part 2

Cedar boards heading up the lake.
This is the second post about replacing the cedar deck at our float cabin. In the previous post, I gave you a little history about how our good friend John built our cabin's foundation and deck.

If you missed it, scroll down to the next post.


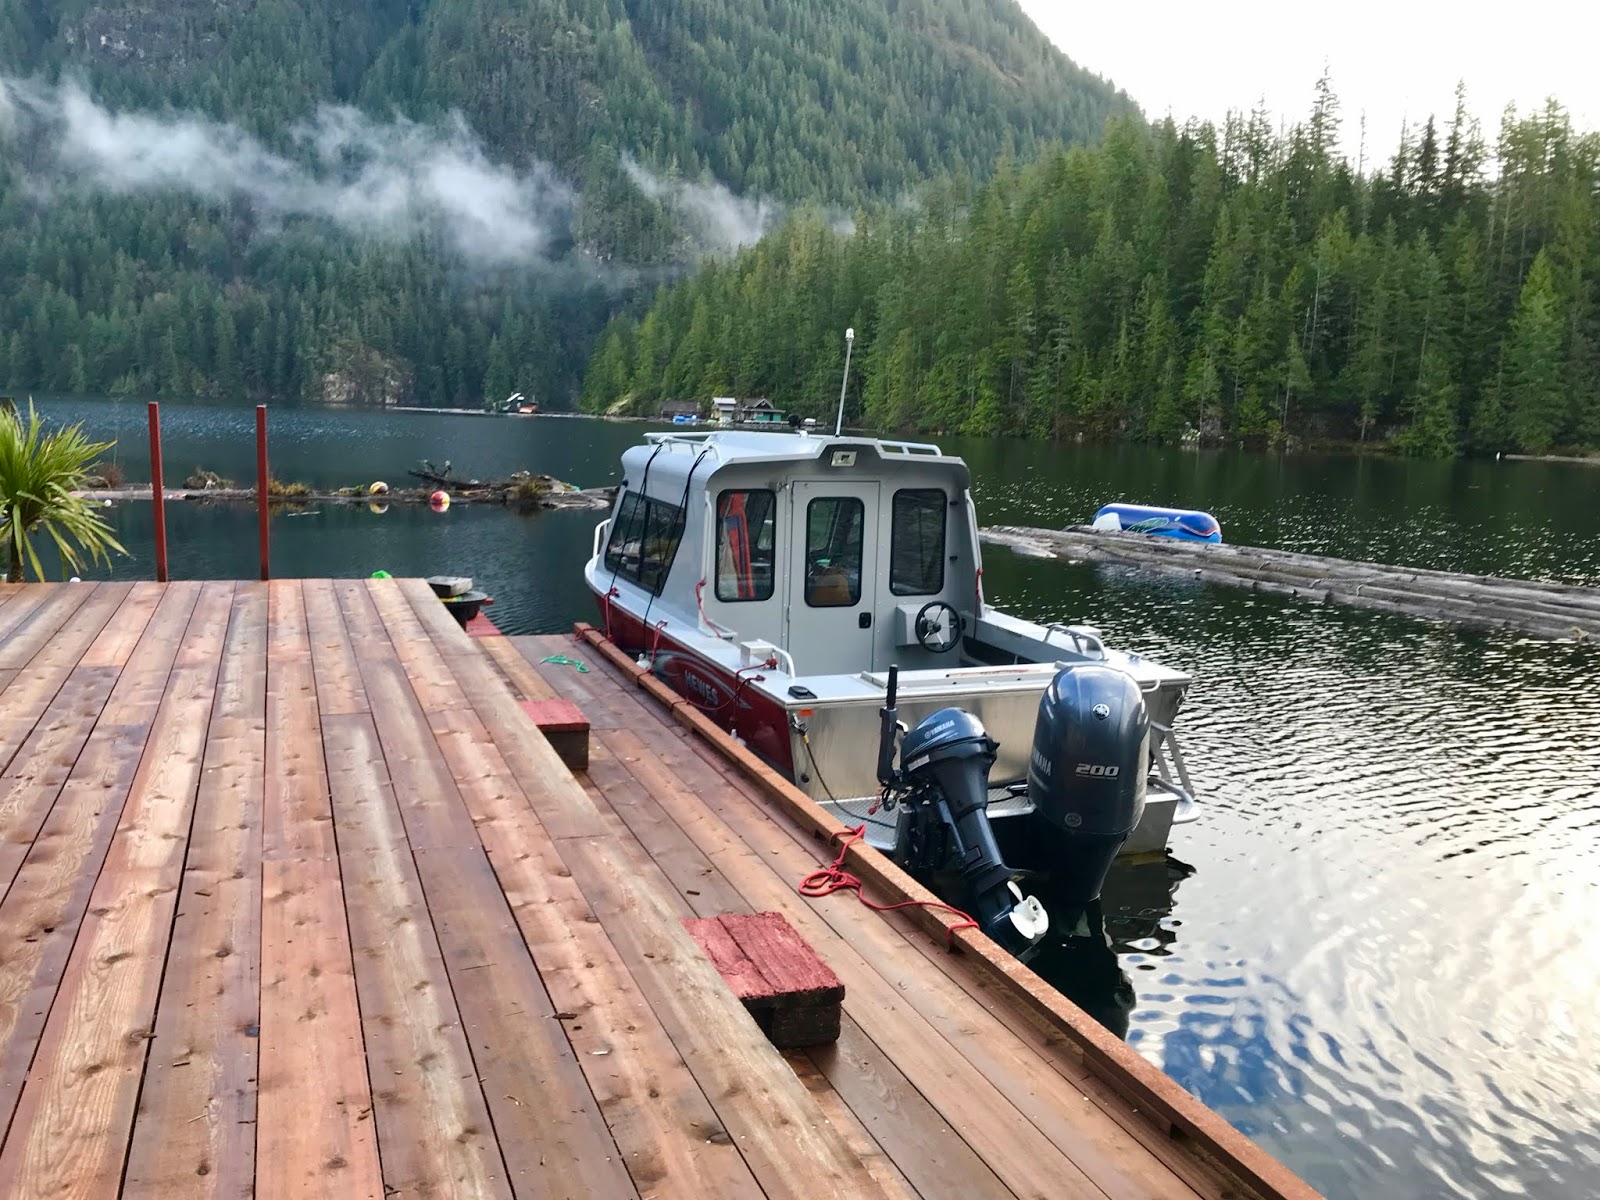
The Hewescraft is a great work boat.
John did the whole project for us. He arranged for old growth cedar boards to be cut to specification. The largest load went up on our barge.

Extras went up on our Hewescraft. Both of these are great work boats.


To give John the time and space needed to work, we coordinated it with our Snowbird RV Adventure to the States.

John repaired the foundation pony walls before replacing the deck boards.

John replaced the cabin's deck a section at a time. Work went from October through December. We were able to get up to the cabin during construction to check on things and enjoy our off-the-grid home.

The cabin front deck, half old and half new. Can you see the difference?

Here are the results. I love the look and smell of fresh cedar lumber.

The side deck and boat dock looking towards Goat Island .

The rear side deck and dock. John added a bull rail to secure our boats with ropes.

The side and front deck.

The front deck looking towards the transition float to shore.

Waste not, want not. John cut up the old deck boards to become future firewood. What wouldn't fit into the floating woodshed remains on our cedar log work float.

Cut up deck boards stored on our cedar log work float.

Old deck boards cut up and stored in our floating wood shed.

Now we are set for another 22 years at the least. Who knows how long we can live up the lake, but if we are able, the sturdy deck and foundation repairs will support us. -- Margy

Thursday, June 07, 2018

Float Cabin Living: Does it move?

Our float cabin soon after we purchased it.
One of the questions we often get is, “Does your float cabin move around the lake?” People think it's like a houseboat, which is understandable. Float cabins aren’t something you see every day.

Before we discovered float cabins on Powell Lake, we knew about the fancy floating homes in marinas such as Sausalito, Portland, Seattle and Vancouver. You may have seen a float home in the movie Sleepless in Seattle. Tom Hanks and his son lived in one.

Cedar log float with cabin floor installed.

Floating homes typically use steel and concrete float structures (yes, they float) rather than lashed cedar logs like the ones on Powell Lake.

Floating logging camp from BC Archives.
Float cabins were originally used for housing and buildings in remote logging and fishing camps. Coastal British Columbia is known for its fjords with steep cliffs plunging right to the sea. Building land structures would have been difficult, if not impossible. Also, floating camps allowed the operations to move easily from one area to the next.

Old timer still in use.
On Powell Lake, float cabins were originally built by paper mill workers from the Powell River Company. Powell Riverites were heading “up the lake” to fish, hunt and just get away. Powell Lake is fjord-like (see "Ancient Sea Water in Powell Lake"). The huge cedar logs for the float structures were plentiful. Wood to build the cabins and shakes for the roofs were right at hand. Floating cabins were a natural.

Stiff leg and cables to shore at low water.
Float cabins on Powell Lake are much the same today. They are typically no frills cabins used by locals as weekend getaways. A few are available for rent. The cabins are attached to shore by steel cables (preferred) or heavy rope. Cement anchors often serve as extra stabilization. As the lake rises and falls during the seasons, the cables or ropes may need to be adjusted.

Towing a float cabin down the lake.
While a boat can tow a cabin fairly easily, they usually remain in the same place throughout their life in a leased water lot. On occasion, you will see a cabin moving up or down the lake for repairs. Since the cabins are almost exclusively boat access only, it can be easier to do major upgrades at the marina or along the lake shore near town.

In "Weathering the Wind," you can read about how our friend John created an ingenious system to dampen the strain on the cables during wind and waves. After major storms it is important to check to make sure your cabin is still attached properly.


If you want to travel around the lake and take your house with you, a houseboat is what you need. But if you love your location and want a permanent home, a float cabin would be for you. It sure is for us. -- Margy

Sunday, June 03, 2018

Float Cabin Living: What happens during storms?

We love to be at our float cabin home in all seasons, so we're there for all types of weather. We are relatively safe in Hole in the Wall. The bay, promontory and nearby Goat Island protect us from the worst winds. On the open lake, especially in the area dubbed the “North Sea” just beyond First Narrows, storm winds out of the southeast can whip the water into three foot plus waves.


After storms pass, clearing northwest winds blast down First Narrows creating dangerous waves. I’ve even seen hefty workboats duck into Hole in the Wall for a brief respite. Traveling on the lake in our Hewescraft would be more dangerous than staying put.


The worst damage we've experienced is a dislodged chimney, broken anchor cables (Up the Lake Chapter 4), and a rust weakened BBQ that flew the coop leaving its legs sticking up like a dead bug. That’s not bad. Several cabins have been severely damaged.


The weight of snow on the float could be a problem. Fortunately Powell Lake’s weather is moderated by the nearby ocean. Snow typically sticks only a few days. The biggest problem we have is uncovering solar panels so we can continue to gather the limited winter sun.

Rain is the most common type of storm. If you live in a floating cabin, a little more water isn’t a problem. Thin cracks between the boards on the deck let the water run right through.


The cabin rides easily up and down on its anchor cables as the lake rises and falls from wet to dry seasons.

Additional weather videos you might enjoy include:

A Snowy Day at Hole in the Wall
Windstorm Waterspouts
Mother Nature Blowing Bubbles

So, let it storm and let it rain. We’re prepared. Are you? -- Margy