Showing posts with label Preserving. Show all posts

Wednesday, August 28, 2019

Growing and Preserving Garlic

Garlic harvested from three containers.
I've grown garlic for years. In the beginning, it was in small containers. I got plenty, but the bulbs were on the small side.

I'm always changing the plants in my float garden. After I removed an old asparagus patch, there was room to grow garlic in the empty space.

Garlic takes very little attention. Plant cloves with the growth point up, mulch, water, feed periodically, dig, dry, and enjoy.

Fall planted garlic heavily mulched with chopped garden waste.

I purchased garlic bulbs good for my climate at the nursery. Now I save my best bulbs for fall planting.  A few bulbs go a long way. You pull the cloves apart and plant them seven inches apart for growth room. I plant in fall and mulch heavily through winter.

Fall planted garlic sprouts in early spring.

When the tops start to brown, wilt, and fall over, it's time to pull the bulbs. If the weather is dry, I leave them on the surface to dry.

Initial drying in the garden after pulling the garlic bulbs.

After the surface of the bulbs have dried, I brush off as much of the dirt as possible, tie the tops of half a dozen together, and hang them in a protected spot outdoors.

Hanging to dry in the shade under the side porch.

This starts the preserving process. I leave them outdoors until the skin on the bulbs is dry and flaky. I trim the tops shorter and hang the bundles in the cabin's storage room. By this time there's no odour, and they're handy to grab for cooking.

Dried garlic hangs in our storage room ready for use.

If you live in an apartment with a balcony, or a home with limited garden space, you can still grow garlic and have plenty left over to share with friends and family. -- Margy

Saturday, December 22, 2018

Canning: Home Canned Apple Pie Filling

Organizing my ingredients and equipment.
After following comments on the Safe Canning Recipes Facebook Page, I wanted to try Apple Pie Filling. I chose the tested recipe below from the Ball/Kerr websiteClick here to see the original.

I purchased a $5.99 5-pound bag of apples and apple juice from the store. The ClearJel I ordered from Amazon. The other ingredients I already had in my fridge and pantry.

Home Canned Apple Pie Filling

Prepare apples, treat to prevent browning
Ingredients:

• 12 cups sliced apples drained
   (about 12 medium)
• Water
• 2-3/4 cups granulated sugar
• 3/4 cup ClearJel
• 1-1/2 tsp ground cinnamon
• 1/2 tsp ground nutmeg
• 2-1/2 cups unsweetened
   apple juice
Measure ingredients.
• 1-1/4 cups cold water
• 1/2 cup lemon juice
• 7 pint glass preserving jars
   with lids and bands

Directions:

1. PEEL, core and slice apples.

2. TREAT apple slices to prevent browning by submerging them in
Blanch apples.
a mixture of 1/4 cup lemon juice
(or 1 tsp of Fruit Fresh/citric acid) and 4 cups water.

3. PREPARE boiling water canner. Heat jars in simmering water until ready for use. Do not boil. Wash lids in warm soapy water and set bands aside.

4. BLANCH apple slices, working
Cover blanched apples to keep warm.
with 6 cups at a time, in a large pot of boiling water for one minute. Remove with a slotted spoon and keep warm in a covered bowl.

5. COMBINE sugar, ClearJel, cinnamon and nutmeg in a large stainless steel saucepan. Stir in apple juice and cold water. Bring to a boil over medium-high heat,
Cook mixture then add apple slices.
stirring constantly, and cook
until mixture thickens and begins to bubble. Add lemon juice, return to a boil and boil for 1 minute, stirring constantly. Remove from heat. Drain apple slices and immediately fold into hot mixture. Before processing, heat, stirring, until apples are heated through.

Fill and process jars.
6. LADLE hot apple pie filling into hot jars leaving 1-inch headspace. Remove air bubbles. Wipe rim. Center lid on jar. Apply band until fingertip tight.

7. PROCESS jars in a boiling water canner for 25 minutes, adjusting for altitude. Remove jars and cool. Check lids for seal after 24 hours.

Making apple sauce and a juice drink.
I then cooked the skins and cores to put through my food mill for two half pints of applesauce. I processed the jars for 15 minutes in the hot water after the pie filling.

Lastly, I simmered the remains in the water I saved from blanching the apples.  I strained the liquid and added sugar and cinnamon to taste. Since this wasn't a tested recipe, it went in the fridge to drink right away.

My apple canning canning results.

That's how I stretched a five pound bag of apples to the max. The total was six pints of apple pie filling, two half pints of applesauce and one quart of apple juice drink. Next year I need to find an abandoned apple tree for even more savings. -- Margy

Friday, December 07, 2018

Insulating a Canning Pantry

Pantry storage in the corner of the bathroom.
When we added a bathroom, I included a pantry for storing home canning, dry goods and other non-perishables. It may seem strange to have a pantry in the bathroom, but when you live in a small home using space wisely is important. Plus, it's on the north side, the coolest place during hot months.

Now that I do more home canning, I am worried about freezing temperatures while we are away on winter holidays.


I asked advice on my favourite Safe Canning Recipes Facebook page. Here's what I decided to do. I started by putting bubble wrap around the back and sides of my pantry shelf.


Then I covered the canning jars with a folded bath towel. To monitor the temperature I'm using a digital thermometer.


Lastly, I put cardboard (from our new BBQ) over the top of each shelf that has canning jars and let it drape over the front.


When the front doors are closed, it should make good insulation to help prevent my canning jars from freezing.

According to the National Center for Home Food Preservation, Accidental freezing of canned foods will not cause spoilage unless jars become unsealed and recontaminated. However, freezing and thawing may soften food. If jars must be stored where they may freeze, wrap them in newspapers, place them in heavy cartons, and cover with more newspapers and blankets.

Do you live in an area with freezing temperatures? How to you make preparations? -- Margy

Tuesday, August 28, 2018

Preserving: Raising and Drying Herbs

Winter at the cabin.
Most herbs are perennial in my garden. We get frost and a little snow, but I've been lucky to have the majority of them last from year to year.

To contain herbs and keep them from spreading throughout my limited garden space, I plant them in plastic pots in the ground. I also grow herbs in containers on the cabin deck.

Herbs in pots along the edge of the float garden beds.

I start most of my herbs from seed including basil, thyme, parsley, sage, dill and cilantro. I purchased starts for rosemary and mint that are now well established.

Herbs, chard and onions hanging to dry.
I pick fresh herbs from spring to fall. Even in winter I can pick some, but it’s handy to have dried herbs in the kitchen.

When I trim herbs back, I save the best for drying. Here’s my simplified method.


Drying Herbs
  1. Cut and keep herbs that have little or no evidence of damage.
  2. Wash the cuttings in fresh water.
  3. Hang upside down or place small cuttings on cookie sheets to dry.
  4. Once dry, remove leaves from the stems and spread them in a thin layer on cookie sheets.
  5. Place the cookie sheets in a warm dry room away from sunlight.
  6. Stir the leaves daily until thoroughly dry.
  7. Depending on the size of the dried leaves, either package whole or cut them into smaller pieces.
  8. Store dried herbs in airtight glass or plastic containers. 
I like to combine my craft painting with dried herb storage.

Hand painted herb containers.

I save small jars and empty spice containers. I paint labels to match the dried herbs I have to store. Sometimes a batch of herbs isn’t large enough to store as a single item. When that happens, it becomes a part of Margy’s Mix. I use my special blend in soups and stews as a flavourful seasoning.

http://powellriverbooks.blogspot.com/search/label/Preserving
For more preserving tips click here.

Do you grow and dry herbs? Let us know any tips you've learned. -- Margy

Sunday, July 15, 2018

Red Currant Jam

Last year I planted a small bare root red currant. This year it’s grown considerably and developed clusters of berries on previous year’s branches. I was surprised at how many. Last week they all started to ripen at once.

I’ve tasted a few and found them too sour to eat raw. The label said they make good jelly, wine and preserves so I thought I would try.


Removing seeds in a food mill.
Red currants contain a lot of seeds, they’re edible but I didn’t want them in my jam. I washed the tender berries then warmed them in a saucepan while crushing with a potato masher. Still warm, I processed them in a food mill to remove the seeds.


Half seeds, half pulp.
From two cups of mashed berries I got one cup of pulp and one cup of seeds to be discarded.

I added one cup of sugar and one tablespoon bottled lemon juice to my one cup of juicy pulp. Because the berries are tart, no pectin was needed.

Cook until jelled at 220 degrees Fahrenheit.
I heated the mixture to a rolling boil and kept it bubbling until reaching 220 degrees Fahrenheit (the jell point). Because I was using a small pan, it was hard to keep the thermometer away from the bottom so I backed it up with the cold-water test for jelly.


Result, one half pint of jam.
I prepared two half-pint jars and my small water bath canner, but in the end I only got one half-pint jar of jam.

I chose to use it as refrigerator jam. Maybe next year I’ll get a bigger crop to make enough to put up for the pantry.

I'm pleased with the taste. It's a tart tang, but not sour like the raw fruit. The label on the bare root stock was right. The fruit does make a good jelly or preserve.


Do you grow red currants? How do you like to use them? -- Margy

Sunday, March 11, 2018

Canning: Pressure Canning Carrots

I grow carrots in my float garden. I plant in spring and begin harvesting in August. I can carrots in the ground through winter. Our climate can get below freezing, but even with a bit of snow they survive better in the ground than indoors.

This week I pulled the last of my carrots to prepare my beds for spring planting. There were so many left I decided to can them to tide us over until the new crop comes in.


I'm new at canning, especially pressure canning. In fact, this is my second time doing it. The first was with potatoes. I found a Facebook group called Safe Canning Recipes and the admins and members help answer my newbie questions. I read their blog, used their advice and then followed the recipe that came with my Presto pressure canner.

Processing the carrots.
First I had to process all the carrots. Some were quite large. Scarlet Nantes get that way yet remain crisp and sweet. I washed, trimmed and peeled them before chopping into medium-sized chunks. Thanks to Ginger on Facebook for the tip to keep them in water until ready to can.

I used the raw pack method. I packed the carrot chunks into each jar leaving an inch of empty space. Then I filled the jar with boiling water, again leaving one inch of head space for expansion during canning.

Filling the pints one at a time.

I have a dial-gauge, so I have to watch the canner while it's working. I treated myself to a glass of wine and played solitaire on my iPad for the 25 minutes of processing time. For complete safe canning instructions refer to National Center for Home Food Preservation and your canner's manufacturer.

The finished product resting for 24-hours on a rare winter sunny day.

Tonight I’ll wash the jars and put them in my pantry. Canning carrots is much easier than jam or pickles. This year I’ll do more vegetables and fruits to have on hand for winter use. It’s been nice to go to my pantry and make meals without having to go to the store so often.

Can’t you image us opening a jar of these lovely bright orange carrots for dinner some night?  Do you can at your home? What are some of your favourite things to put up? -- Margy

Saturday, February 03, 2018

Canning: Pressure Canning Potatoes

I grow potatoes in a hillside potato patch created from compost. I also grow potatoes in containers on the deck. I harvest in August or early September then store my crop in open plastic trays under the guest bed downstairs.

This year I got four trays of potatoes. We've eaten one and one I'm saving for seed potatoes.

Rather than letting them all sprout, I decided to preserve one tray full in my pressure canner.

I follow a Safe Canning Recipes Facebook page. They have a blog with links to safe tested canning recipes.

I've had a Presto pressure canner for months but have been afraid to use it. I was recently inspired to try canning potatoes. 

I used a recipe from National Center for Home Food Preservation and a link to basic safe canning procedures. Refer to them for full directions.

Canning White Potatoes

Procedure:

Wash, peel, place in ascorbic acid solution
Wash and peel potatoes. Place in ascorbic acid solution to prevent darkening. If desired, cut into 1/2-inch cubes. Drain. Cook 2 minutes in boiling water and drain again. For whole potatoes, boil 10 minutes and drain.

Cook and rinse.
Add 1 teaspoon of salt per quart to the jar, if desired. Fill jars with hot prepared potatoes, leaving no more than 1-inch headspace.

Place potatoes in sterilized jars.
Cover hot potatoes with FRESH boiling water, leaving 1-inch headspace and covering all pieces of potato. (Do not use the water you cooked the potatoes in; it contains too much starch.)

My float cabin is less than 1000' in elevation so I processed the jars for 35 minutes at 11 pounds of pressure. Follow this link for detailed processing times.

I got eight pints from my tray of Yukon Gold potatoes. We'll keep these on the shelf to eat after the remaining basket of fresh potatoes is finished.

These will get us through several months while waiting for a new crop.


Do you use a pressure canner? What kinds of foods do you put up for your pantry? What are some of your family's favourites. -- Margy

Saturday, January 27, 2018

Canning: Carmel Apple Jam

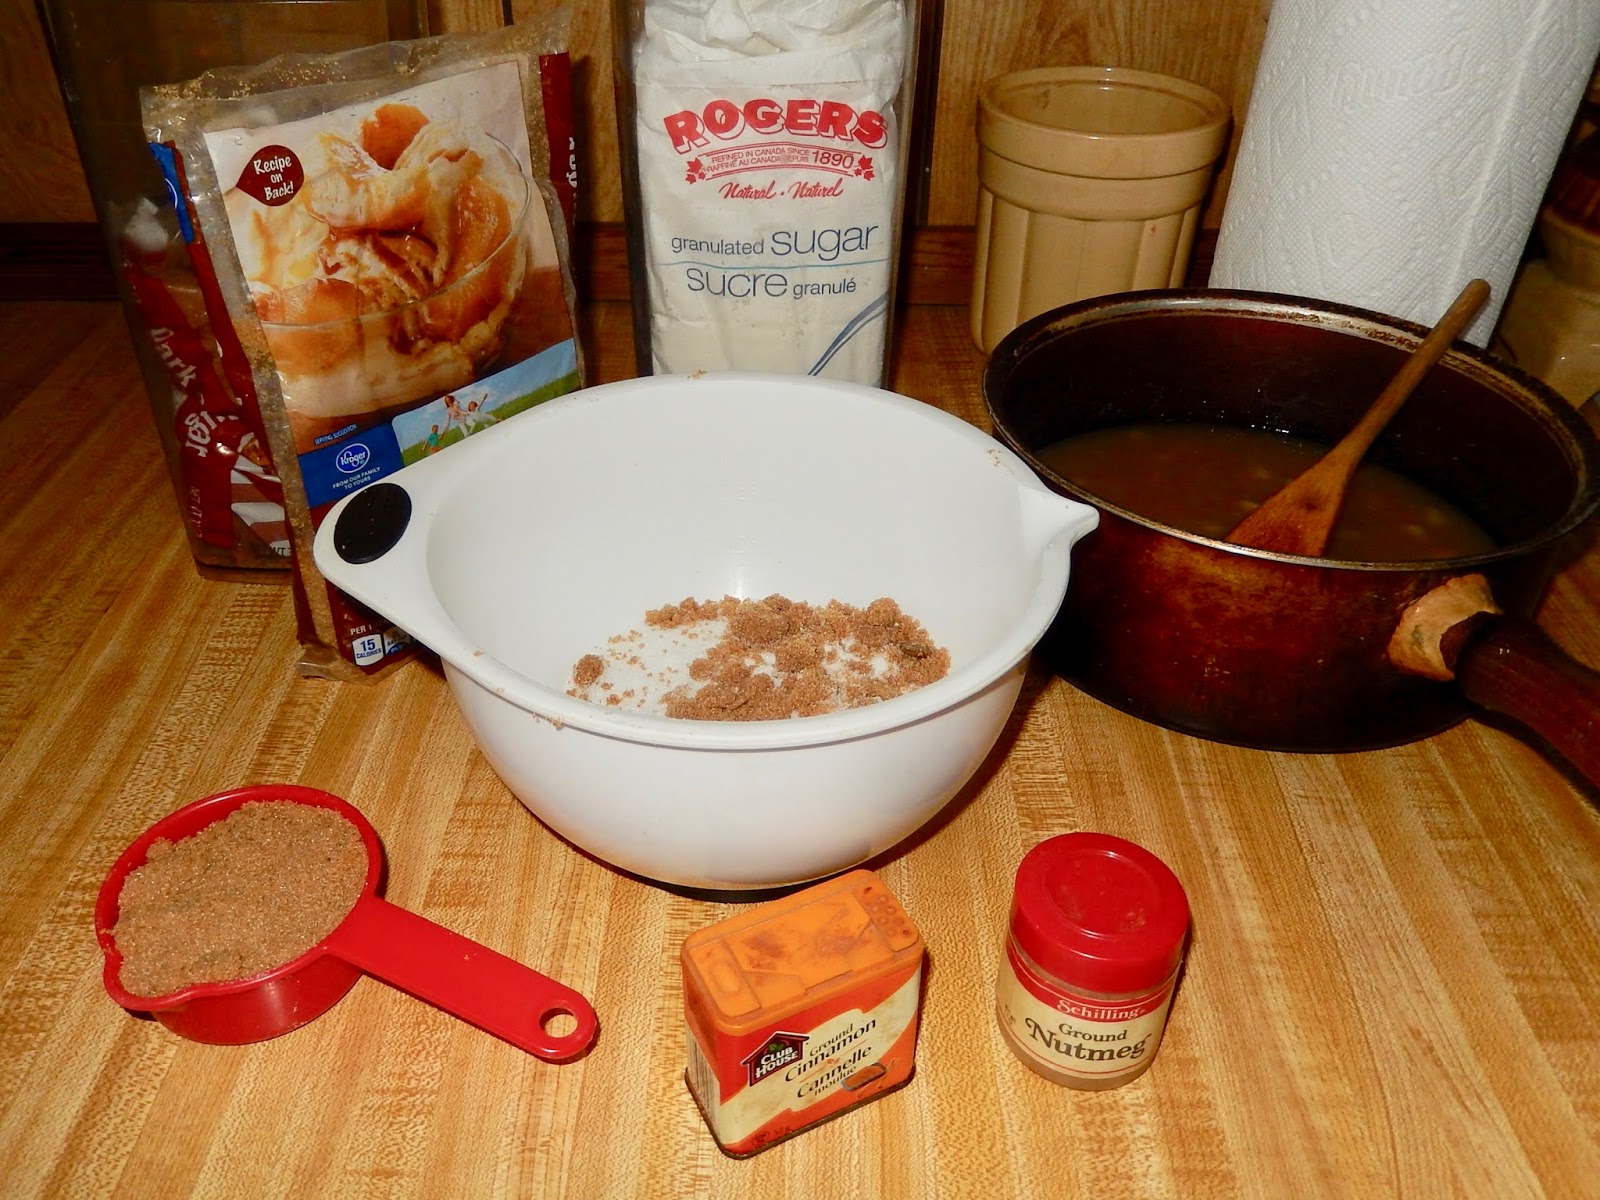
I’ve been saving apple skins and cores in the freezer. My plan was to make Apple Peel (Scrap) Jelly but I didn’t want to waste the flesh clinging to the skins. I found a recipe for Carmel Apple Jam at Canning Homemade through the Safe Canning Recipes Blog that looked more interesting.

Carmel Apple Jam

Preparing the apple.
Ingredients:

6 cups diced peeled apples
½ cup water
1 package powdered pectin
2 cups granulated sugar
1 ½ cups light brown sugar
½ teaspoon ground cinnamon
¼ teaspoon ground nutmeg

Making apple sauce from frozen skins.
Directions:

Preparing the sugar and spices.
Cook apples and water over low heat until soft. Stir in pectin and bring to a full rolling boil stirring constantly. Stir in sugars, cinnamon and nutmeg. Return to a full rolling boil and boil for one minute. Remove from the heat and skim off any foam. Pour hot jam into hot sterilized jars leaving ¼-inch headspace. Adjust lids and process for 10 minutes in a boiling-water bath. Yields 7 half-pints.

My Approach:

Cooking the jam with pectin.
Each time I peel apples (all types) I soak the scraps in a solution of citric acid powder and water to prevent browning. Before freezing I remove any seeds.

Filling the sterilized jars.
When I had enough, I put the peels in a saucepan with half a cup of water. I let them simmer on low for an hour covered and then uncovered until the water evaporated and they were mushy.

I processed the softened scraps in a food mill. The result was a thin applesauce. I added one diced cooked Granny Smith apple for texture.

Using my single jar water bath.
I made a half batch following the recipe except I increased the cinnamon. I love cinnamon.

I’m very happy with the results. The taste is rich and not overly sweet. Next time I’ll use two diced apples to go with my scraps. I’ll also cook the apple cubes longer and mash them to a smoother consistency.

Carmel Apple Jam topping on my yogurt.
Carmel Apple Jam is good on biscuits, toast and as a topping for yogurt and ice cream.

Do you have any favourite recipes for apples or apple scraps? -- Margy