Over the years I've painted several large rocks. When fall arrives and flowers depart, they brighten our lower deck.
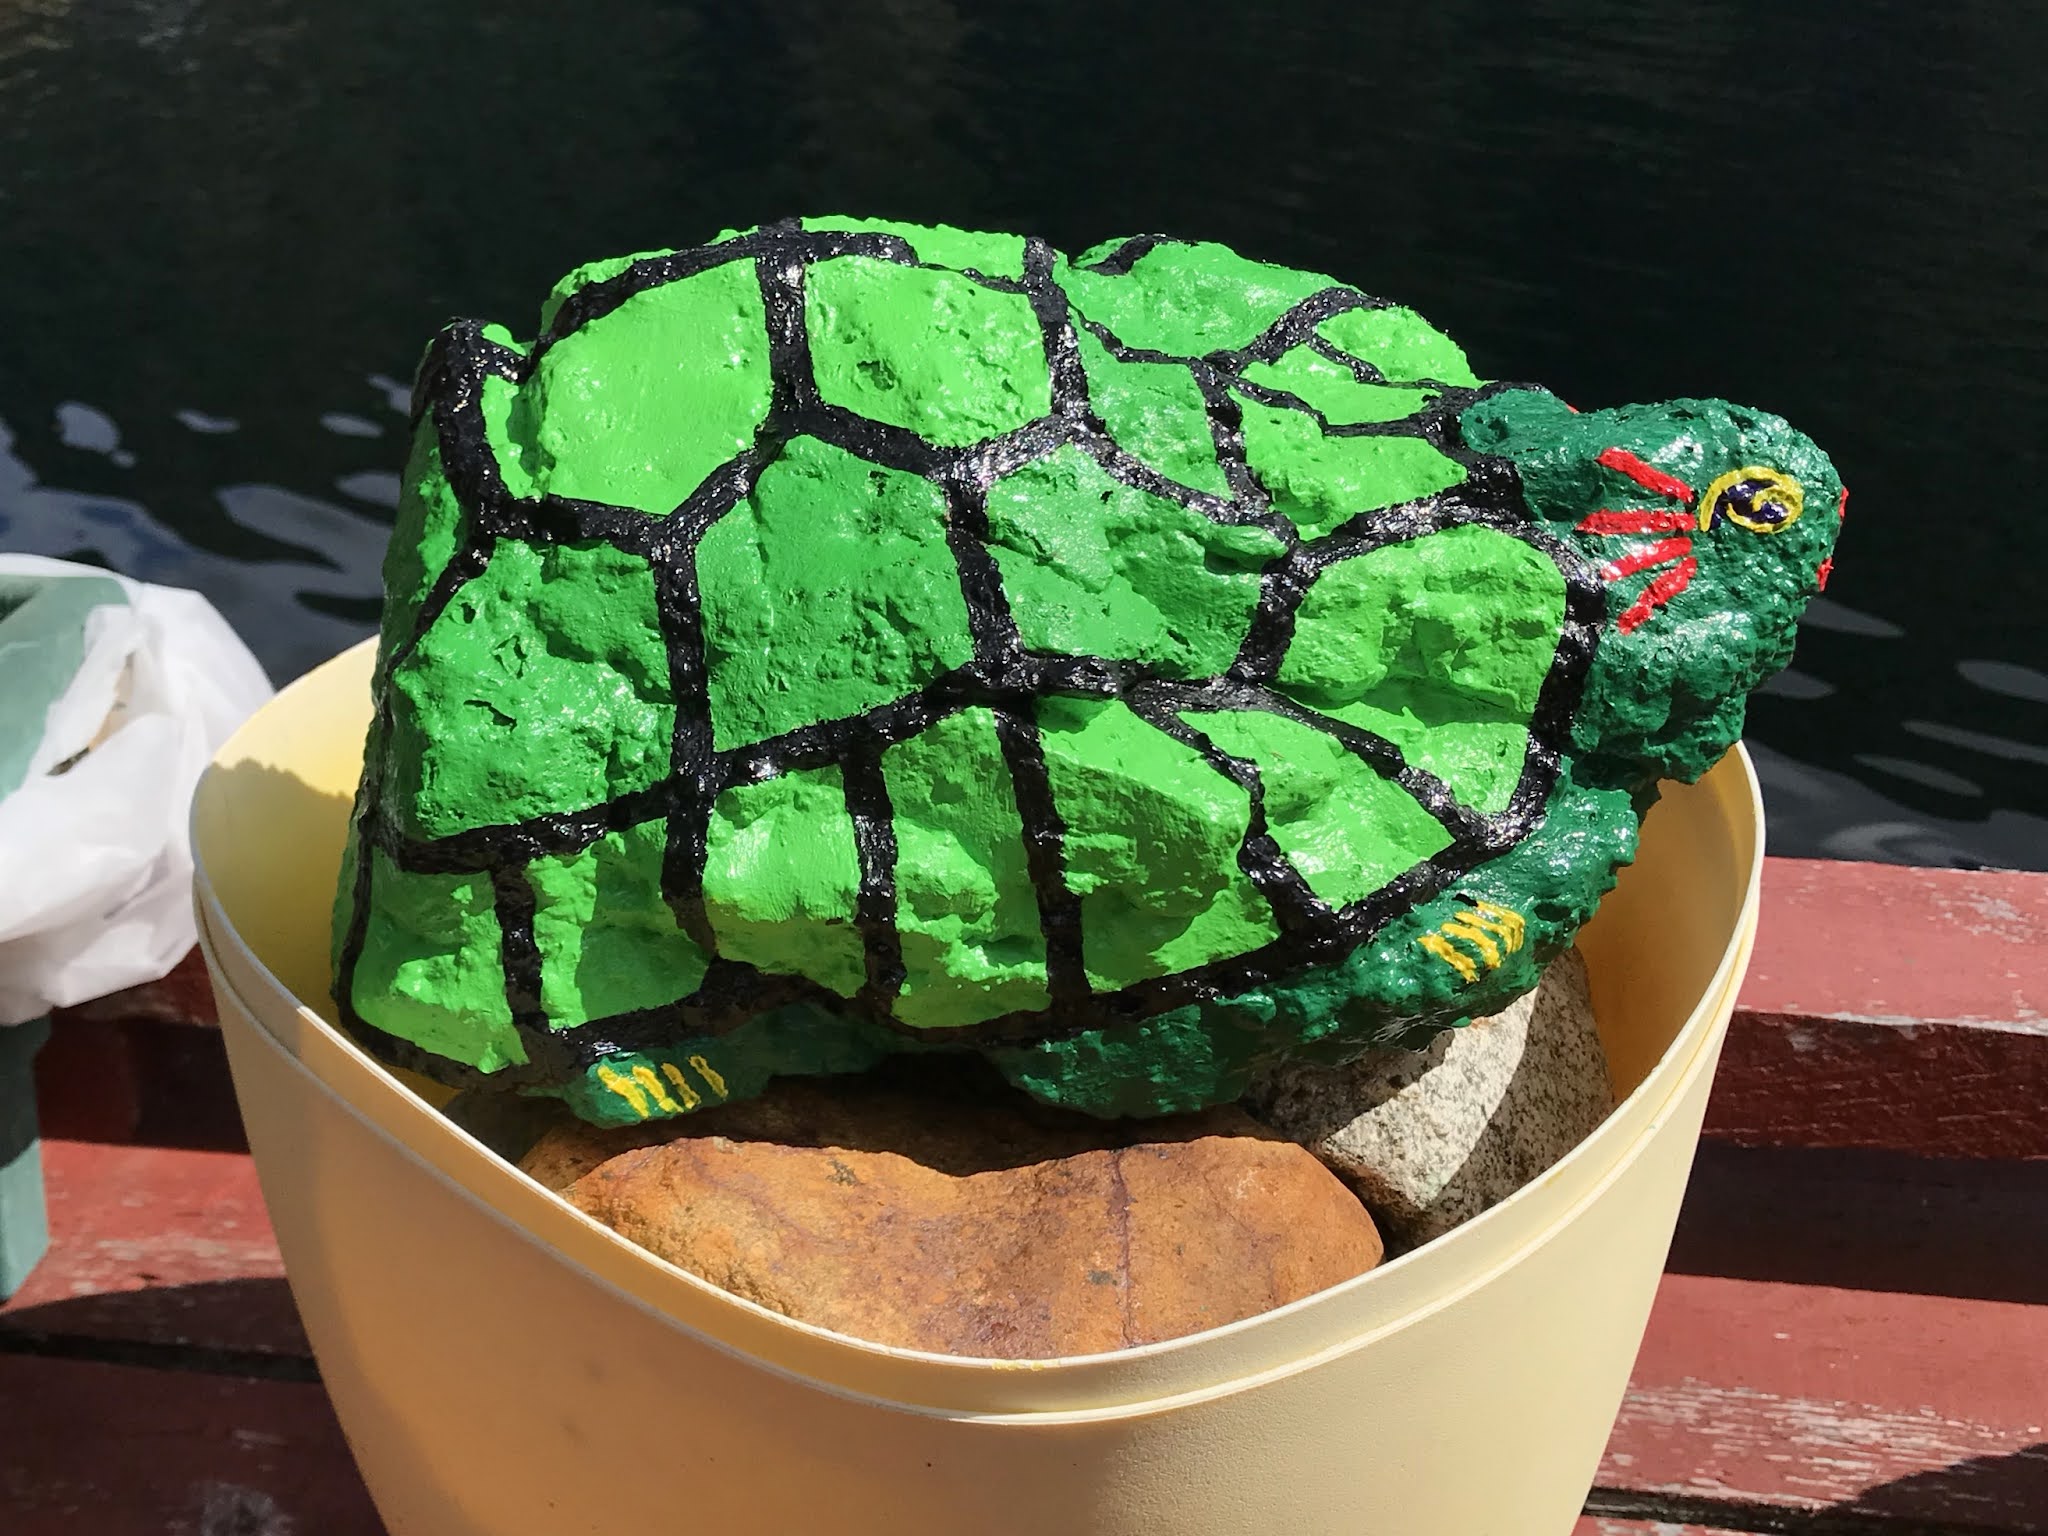
Sometimes a rock tells me what it wants to become. The first one told me it wanted to be a turtle. Rocks sometimes tell different people different stories. Wayne saw Kobe Bryant's basketball shoe so I named it Kobe after the Los Angeles Lakers star. Kobe needed a repaint in 2016 and again this year.
The original rock that became Kobe the Turtle.
For my second project, I searched for a ladybug shaped rock. It was smoothed by Powell Lake's waves and easier to paint. It was so heavy I had a hard time carrying it from the Shinglemill beach to our boat.
This summer I painted a rock I call Frogger after an old-time computer game. I selected the rock on a barge camping trip to Goat Lake. It looked perfect, but after painting I don't think it was best shape.
Frogger on the corner of the front deck.
Frogger has taken up residence on the other side of our front deck. Her weight will help hold the corner down when wind and boat waves wash through our front "yard."
I had lots of fun painting this summer. Do you paint rocks? Are they large or small? Tell us your stories. -- Margy
Most herbs are perennial in my garden. We get frost and a little snow, but I've been lucky to have the majority of them last from year to year.
To contain herbs and keep them from spreading throughout my limited garden space, I plant them in plastic pots in the ground. I also grow herbs in containers on the cabin deck.
Herbs in pots along the edge of the float garden beds.
I start most of my herbs from seed including basil, thyme, parsley, sage, dill and cilantro. I purchased starts for rosemary and mint that are now well established.
Herbs, chard and onions hanging to dry.
I pick fresh herbs from spring to fall. Even in winter I can pick some, but it’s handy to have dried herbs in the kitchen.
When I trim herbs back, I save the best for drying. Here’s my simplified method.
Drying Herbs
Cut and keep herbs that have little or no evidence of damage.
Wash the cuttings in fresh water.
Hang upside down or place small cuttings on cookie sheets to dry.
Once dry, remove leaves from the stems and spread them in a thin layer on cookie sheets.
Place the cookie sheets in a warm dry room away from sunlight.
Stir the leaves daily until thoroughly dry.
Depending on the size of the dried leaves, either package whole or cut them into smaller pieces.
Store dried herbs in airtight glass or plastic containers.
I save small jars and empty spice containers. I paint labels to match the dried herbs I have to store. Sometimes a batch of herbs isn’t large enough to store as a single item. When that happens, it becomes a part of Margy’s Mix. I use my special blend in soups and stews as a flavourful seasoning.
My mother was a crochet expert. I wish I'd taken the time to learn from her, but my life seemed too busy at the time. Now that I'm retired and live in an off-the-grid float cabin I have plenty of time to learn new skills.
I needed a book for guidance. Crochet: A Basic Manual for Creative Construction by Mary Tibbals Ventre (Little Brown and Company, 1974) is perfect. It has detailed photographs and easy to follow directions.
Making Crochet Sofa Armrest Covers
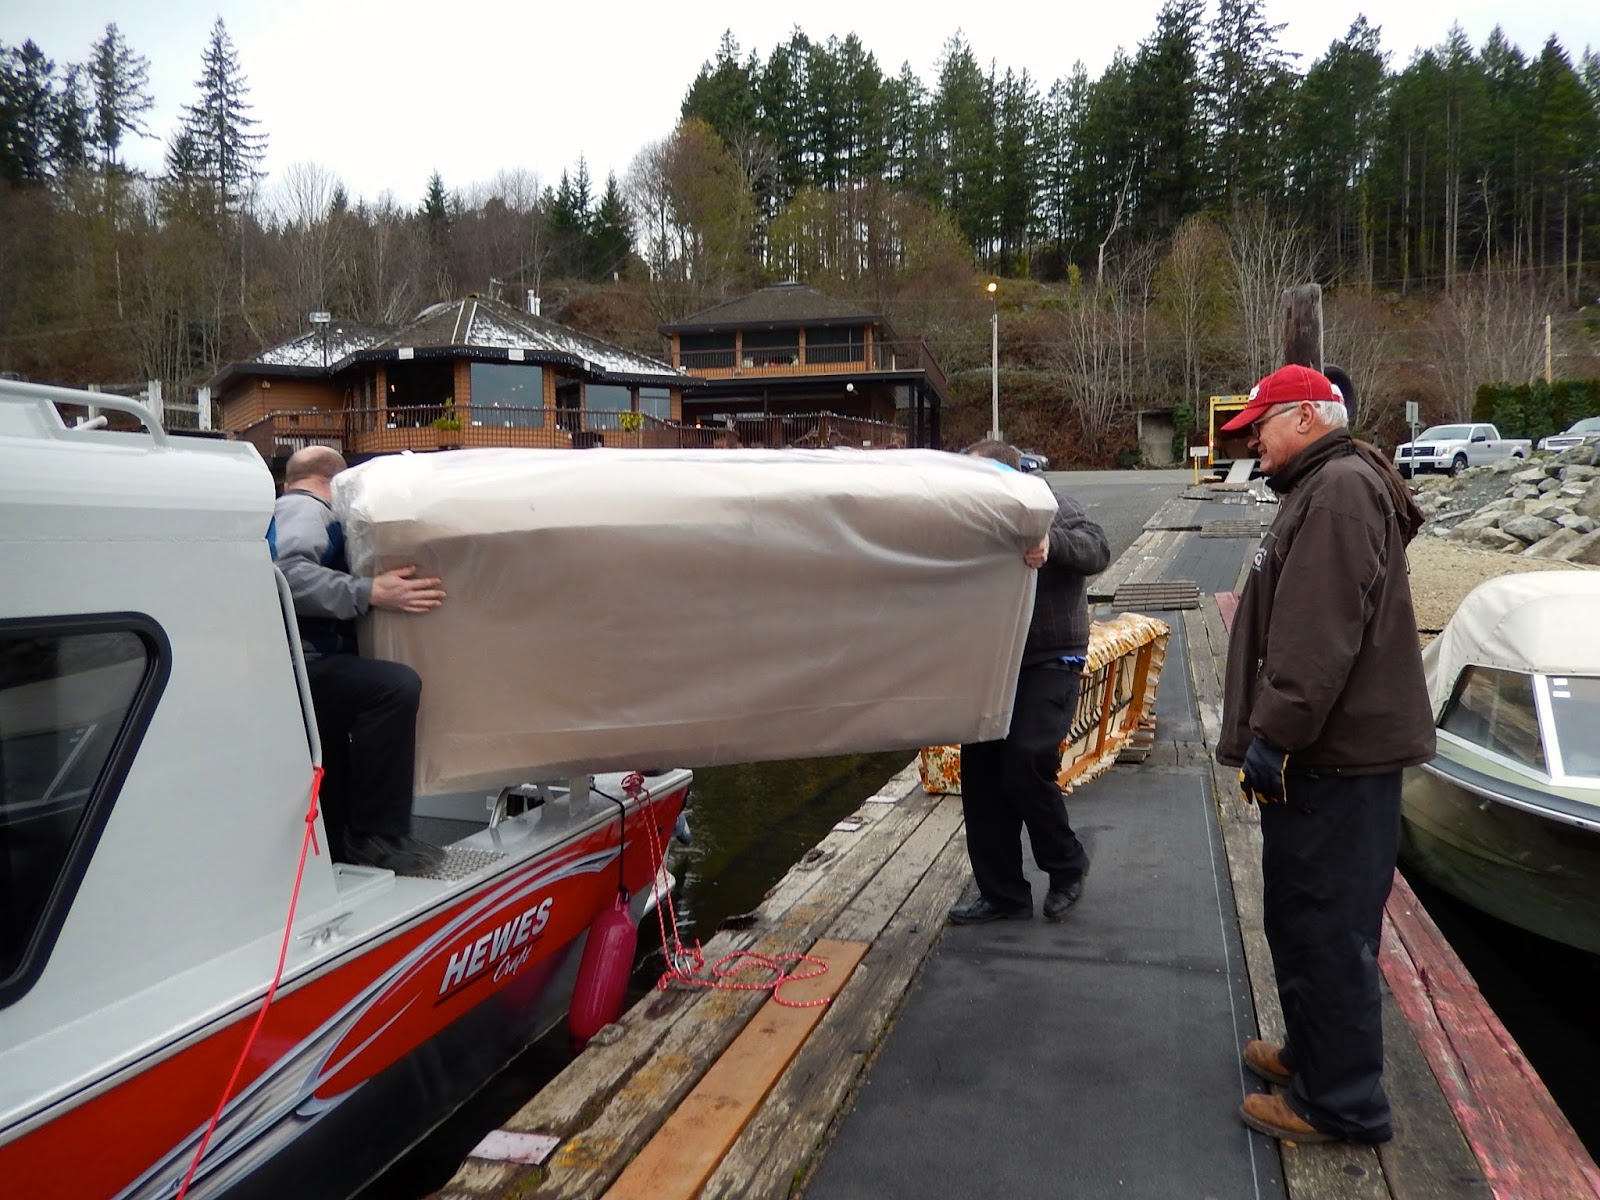
We purchased a sofa in 2013 and brought it up the lake in our boat. Now I've decided to make armrest covers before there's any more wear.
I picked a single crochet pattern involving a circle and a rectangle. Stitched together they form a snug armrest cover.
Directions for a spiral circle from Crochet by Mary Tibbals Ventre:
Make a foundation chain of three stitches and then make seven single crochets into the third chain stitch from the hook, which is the first stitch of the foundation chain. Mark the completion of the first round. (I used a small safety pin.) For the next round make two single crochets in each single crochet stitch of the previous round for a total of fourteen stitches. Mark the completion of the round.
For the third round, again make two single crochet stitches in each single crochet stitch of the previous round, for a total of twenty-eight stitches. After these three rounds, fewer increases are needed to keep the circular form flat. The number of increases will vary with the kind of yarn used, hook size and tension. A more or less accurate way of making a larger circular form is to alternate rows of single crochet that are not increased with rows of single crochet that are increased.
Directions for the rectangle:
Make a rectangle large enough to cover the sofa arm. Mine began with 75 chain stitches and then row after row of single crochet. The tricky thing for me was to remember to do an extra chain at the end of each row before turning to maintain the same number of stitches. Crochet 101 at The Stitchin' Mommy has excellent step by step illustrations.
Stitching it together:
I used a craft needle to weave in the yarn tails where I had to join pieces together. Then I lined up the end of my finished rectangle with the circle and stitched them together with matching yarn. I liked the spiral look of my circle so I chose that for the outside.
The result was a perfect fit. And using single crochet made a thick durable cover to protect the sofa arms from further wear.
Do you crochet? How did you learn? What kinds of things have you made? -- Margy
I made one of my own last summer. Click here to see the directions. It worked fine until the rains came. The u-shaped openings that allow birds to feed also allowed rain water to get into the bottom with no way out. The result, soaked and swollen birdseed.
Using a nail to drill holes in the bottom.
It was time to make some modifications or take it down until next summer.
I chose to make some changes to improve performance.
Improvements for the Twirling Bottle Bird Feeder:
Cut a small hole in the pan's middle.
Tape the edges to prevent leakage.
Drill small holes in the bottom to allow rainwater to drain.
Use a small metal pie pan for a roof.
Add plastic beads to the bottom to reduce the amount of seed near the drain holes.
Use a fuel funnel to fill the bottle through the small top opening.
Screw the cap back on above the new roof.
Hang the bird feeder from a tree or post.
To keep squirrels off, hang it at least a foot away from any branch.
Insert plastic beads to fill the bottom area.
I hung my new and improved twirling bird feeder back on the bridge railing.
It is in a perfect spot for me to watch the action from my side of the sofa in the cabin.
So far, two Oregon Juncos have been using it.
Beads fill area below the feeder openings.
Plus a chipmunk who's learned how to leap about two feet from the bridge deck up onto the smooth round perch.
At least he eats daintily and doesn't flick the seeds into the lake water below.
Using a fuel funnel to fill with seeds.
Now I use a plastic fuel funnel to fill my bottle.
The bottom of the funnel fits nicely into the top opening. No more seeds spilling out of my rolled up paper funnel.
Did it solve my problem? So far, but the really heavy rains haven't arrived yet. I'll keep you posted.
The improved twirling bottle bird feeder hanging from our bridge to shore.
Here's my feeder ready for whatever the fall and winter may bring, or at least I hope so.
Thanks again to Wanderin' Weeta for this great idea. And for my readers, I highly recommend visiting her blog. She's a nature expert, superb photographer and takes us along to explore Vancouver Island's many trails and back roads. -- Margy
The twirling design was to make it squirrel proof. My problem isn't squirrels, but a Steller's Jay that is making a mess with my bird feeders. He's too big and knocks the seeds into the lake.
Push a small nail through the plastic about an inch and a half up from the bottom. Use a large nail then a straight pen to make the hole fit the stick.
Make another hole on the opposite side of the bottle.
Use a nail and hammer to make a hole in the center of the lid.
Use a sharp knife to cut two inch horizontal slits about 1/2 inch above each hole.
I used duct tape to cover the sharp lower slit edges.
Squeeze just above the slits to make U-shaped openings for birds to reach the seeds.
Thread twine through the slits. Tie one end firmly around the top of the bottle just below the lid. Pull on the other end until the twine holds the two U-shaped sections permanently open. Tie firmly around the neck of the bottle.
Force the twig (I used a length of bamboo plant stake) through the bottle. It should fit snugly. This will make the perches.
Thread another length of twine, about 3 feet long, through the lid. Tie the inside end around the washer or nut. Pull the washer tight inside the lid and tie a knot on the outside.
Finishing Touches:
Fill your bottle with bird seed.
Screw on the cap.
Hang the bird feeder from a tree or post. To keep squirrels off, hang it at least a foot away from any branch.
I hung my new twirling bird feeder on the bridge railing.
Did it solve my Steller's Jay problem? Well, not completely. But with smaller holes in the feeder, the Oregon Juncos at least have a fighting chance to get something to eat before it all gets flicked out.
Thanks Wanderin' Weeta for giving me this great idea. And for my readers, I highly recommend visiting her website. She's a nature expert, superb photographer and takes us along to explore Vancouver Island's many trails and back roads. -- Margy
An Orchard Mason Bee heading into one of the holes at full speed.
Last year I made and used bee hotels for the first time. We have Orchard Mason Bees in our area, so I looked online for information about how to build a bee hotel that would meet their needs.
In our area Mason Bees hatch, begin feeding and look for likely nesting sites in March.
Last year's filled nesting blocks resting under the front porch.
Males emerge first but have to wait for females before the mating season begins. Mason Bees remain active for 4 to six weeks. While they feed and collect pollen for their nests and larvae, they are busy with the important process of plant pollination.
Old nesting blocks face southeast to catch the morning sun and encourage hatching.
Building bee hotels is a simple process. I made mine from old birdhouses. Drill nesting blocks out of untreated wood you have on hand. I use driftwood sticks. Drill 6-inch deep 5/16-inch holes with an opening only in the front. Mount your hotel above ground, where it won't sway, facing south or southeast for plenty of sun.
Drilling blocks 6" deep encourages female production.
Larvae mature during the summer and remain dormant from fall through winter. A freezing snap followed by increased sunshine and warming weather breaks their dormancy. To get ready for the hatching phase, and to provide new nesting sites, Wayne and I made new blocks. We gently moved the old ones to a location nearby so the hatchlings can easily find their new nesting blocks.
New nesting blocks with 5/16" holes also encourages female production.
See below for detailed information from making my bee hotel and nesting blocks last year.
On a warm summer day in 2012, our good friend John came by for a swim in our natural swimming pool behind the cabin. He dove down and brought up a large, heavy chunk of granite and placed it on the stump in our pool. The rock spoke to me. I got out my acrylic paints and released its inner turtle.
Refreshed Kobe the Turtle on his cedar log pedestal.
Four years of rain, wind, snow and sun have taken their toll. Rather than retirement like his namesake, it was time to give Kobe the Turtle (read Release Your Inner Turtle to learn why) a fresh coat of colour.
After several coats of protective clear acrylic spray Kobe was ready to retake his place of honour on the cedar log pedestal at the corner of the transition float. From here he can monitor activity in Hole in the Wall and at our float cabin home.
Do you do rock painting. What are some of your projects? -- Margy
Does wood ever speak to you? Sounds silly, but every time I pick a piece of driftwood out of the lake I listen to what it has to say. Most often it's, "I just came by to help you keep warm this winter."
But other times, driftwood has a different message. Stumps beg to become floating planters. Medium sized gnarly pieces ask to come aboard to decorate our deck. Smaller piece often have a unique message of their own.
This piece of driftwood told me it wanted to become a Christmas decoration we could bring out each year to celebrate the holiday.
I must be honest, I'd just seen an article in the Peak advertising a local crafter's wares at Artique, the local artist cooperative shop. When I saw this piece of wood float by, I knew what it would become.
All it took was some acrylic paint, yarn to make a ball for the top of Santa's hat, and two nails and a piece of yarn on the back for a hanger. The driftwood shape was perfect just the way it was for the task.
I enjoy using handmade decorations for the season, and my driftwood Santa wall hanging fits right in.
Are you making anything special for Christmas this year? -- Margy
Bunny was born in 2003 when my float garden was new. Wayne brought him to the cabin at Easter that year, and Bunny has lived there ever since. Living outdoors 24/7 can be tough. In 2008, Bunny came indoors for a short stay and some reconstructive surgery.
This year, Bunny came in for a facelift. His plywood back brace was a bit curved, but still sound. Over the last six years (that's so hard to believe), his colours have yellowed and faded. A repaint front and back returned Bunny to his former glory.
Now Bunny's back in his garden home, watching over his budding veggies. Live long and prosper! -- Margy
Back in 2008, we took an old propane tank and turned it into a whale to ride the waves next to the log boom at our cabin. Over the years, riding in the water and rubbing on the logs removed some of his paint and allowed rust to return.
Wayne brought Mr. Whale in to give him a redo. First, the bottom was painted with several coats of primer. Then his painted surface got a touch up. Fortunately, we saved all of the old paint and it was still in good condition.
Once Mr. Whale was finished, he got a boat ride back out to his place of honour on the log boom. There he swims in all seasons, and greets neighbours and visitors (we call them lookie loos) that come in and out of the Hole in the Wall.
As far back as I can remember, Mom was an avid crocheter. She made numerous shawls, ponchos, doilies, Christmas ornaments, and afghans for family and friends. Her beautiful afghans became donations for club raffles and PEO scholarship fund raisers.
When I was little, I have vivid memories during camping trips of Mom sitting on large granite rocks, or fallen logs, crocheting away while Daddy and I fished in a stream nearby.
Mom loved the outdoors, but wasn't a fisherperson.
In later years, crocheting was limited by arthritis. Yet she continued to make afghans. Her favourite method was crocheting squares and then sewing them together to create the final product. For entertainment, she would crochet a square before bed. That way she could savour the experience.
Wayne and I have lots of beautiful afghans to remember Mom by. And so does her (now our) kitty Stick Tail. My favourite is on our bed. It makes our mornings colourful and bright, even on cold winter days.
I should have asked Mom to teach me how to crochet before it became too difficult. I've tried learn on my own. Stick Tail needs an afghan for one of his sleeping spots at the cabin. Fortunately, he's very forgiving about mistakes. -- Margy
Have you dreamed of moving off the grid and living in harmony with nature? What will it take? How do you get started? Author Wayne Lutz shares valuable insights that will inspire and assist you in fulfilling your dream.
Check with your favourite online bookseller or go to PowellRiverBooks.com for more ordering information.
Head up Powell Lake to experience life in a float cabin, take a boat to Desolation Sound, ride a quad into the backcountry and fly overhead for a unique view of this incredible place. Read Up the Lakeby Wayne Lutz and then join us for the vacation of a lifetime. You may never want to leave.
Take a realistic look at life in a remote location where you make your own power, live in harmony with nature, and determine your own destiny. Read Off the Gridby Wayne J. Lutz and see how it works for a couple living in a Coastal BC float cabin.
Cabins float in a cut-off fjord of British Columbia’s south coast. One man tackles an on-going dream to construct a floating cabin on Powell Lake, from the water up – not his first, but his finest. Read Cabin Number 5by Wayne J. Lutz and experience it for yourself.
Travel up the main logging roads for an unparalleled backcountry experience. Whether you go by ATV, motorcycle, mountain bike, car or on foot, you can find clear mountain streams, hidden lakes and uncrowded campsites. Read Up the Mainby Wayne Lutz and ride along with us.
Stories of ATV exploration, hiking, and survival for the stout of heart and those who crave wilderness adventure. Set in remote Canada where people are isolated from the bustle of the surrounding world. Read Farther Up the Mainby Wayne J. Lutz and experience it for yourself.
Join Wayne, Margy, John, and Powell River ATV Club members as they explore the Powell River backcountry by ATV. Read Beyond the Mainby Wayne J. Lutz for ideas about where to ride or just experience this exciting sport from the comfort of home.
Join us for quad adventures to destinations on Powell and Goat Lakes only accessible by boat. Visit unique places where all-terrain vehicles can explore logging roads and trails in one of British Columbia’s most picturesque regions.
Check with your favourite online bookseller or go to www.PowellRiverBooks.com for more ordering information.
**********
Let's go "Up the Strait"
Up the Strait
Coastal BC Stories
Jump in the boat and head up the Strait of Georgia to magnificent anchorages and exciting adventures.
Go to www.PowellRiverBooks.com for ordering information.
********************************
Farther Up the Strait
Coastal BC Stories
Boating on the Strait of Georgia, British Columbia, and the islands to the north. Stories of the people and places of coastal British Columbia, where the mountains drop into the sea and lifestyles focus on self-reliance and a different sense of purpose. Read Farther Up the Straitby Wayne J. Lutz and experience it for yourself.
For the pilot and adventurer at heart. Fly high over beautiful Canadian lakes, forests and inlets. Land at remote strips and camp under starry skies. In addition to BC, travel to the Arctic Ocean, Hudson Bay, Canadian prairies and Pacific Northwest for a unique travel experience.
Go to www.PowellRiverBooks.com for ordering information.
***************************
Come to BC for Winter Fun
Up the Winter Trail
Coastal BC Stories
Your winter holiday plans won't be complete without a visit to Powell River and its uncrowded winter vacation opportunities. Hike, snowshoe, cross country ski - we have it all and more. Want a preview? Read Up the Winter Trailby Wayne Lutz.
The Powell River Books Blog is designed to promote the books written by Wayne J. Lutz. On occasion, reviews of other products or services are included as informational posts. No cash or in-kind payment has been received for any of those posts.
Cookies Notification
This site uses cookies from Google to deliver its services, to personalize ads and to analyze traffic. Information about your use of this site is shared with Google. By using this site you agree to its use of cookies. Click here for more information about Google's use of cookies. Click here to read Google's privacy policy.



 Labels:
Cabin Accessories,
Crafts,
Float Cabin Living
Labels:
Cabin Accessories,
Crafts,
Float Cabin Living




 Posts
Posts


