Showing posts with label Canning. Show all posts

Saturday, December 22, 2018

Canning: Home Canned Apple Pie Filling

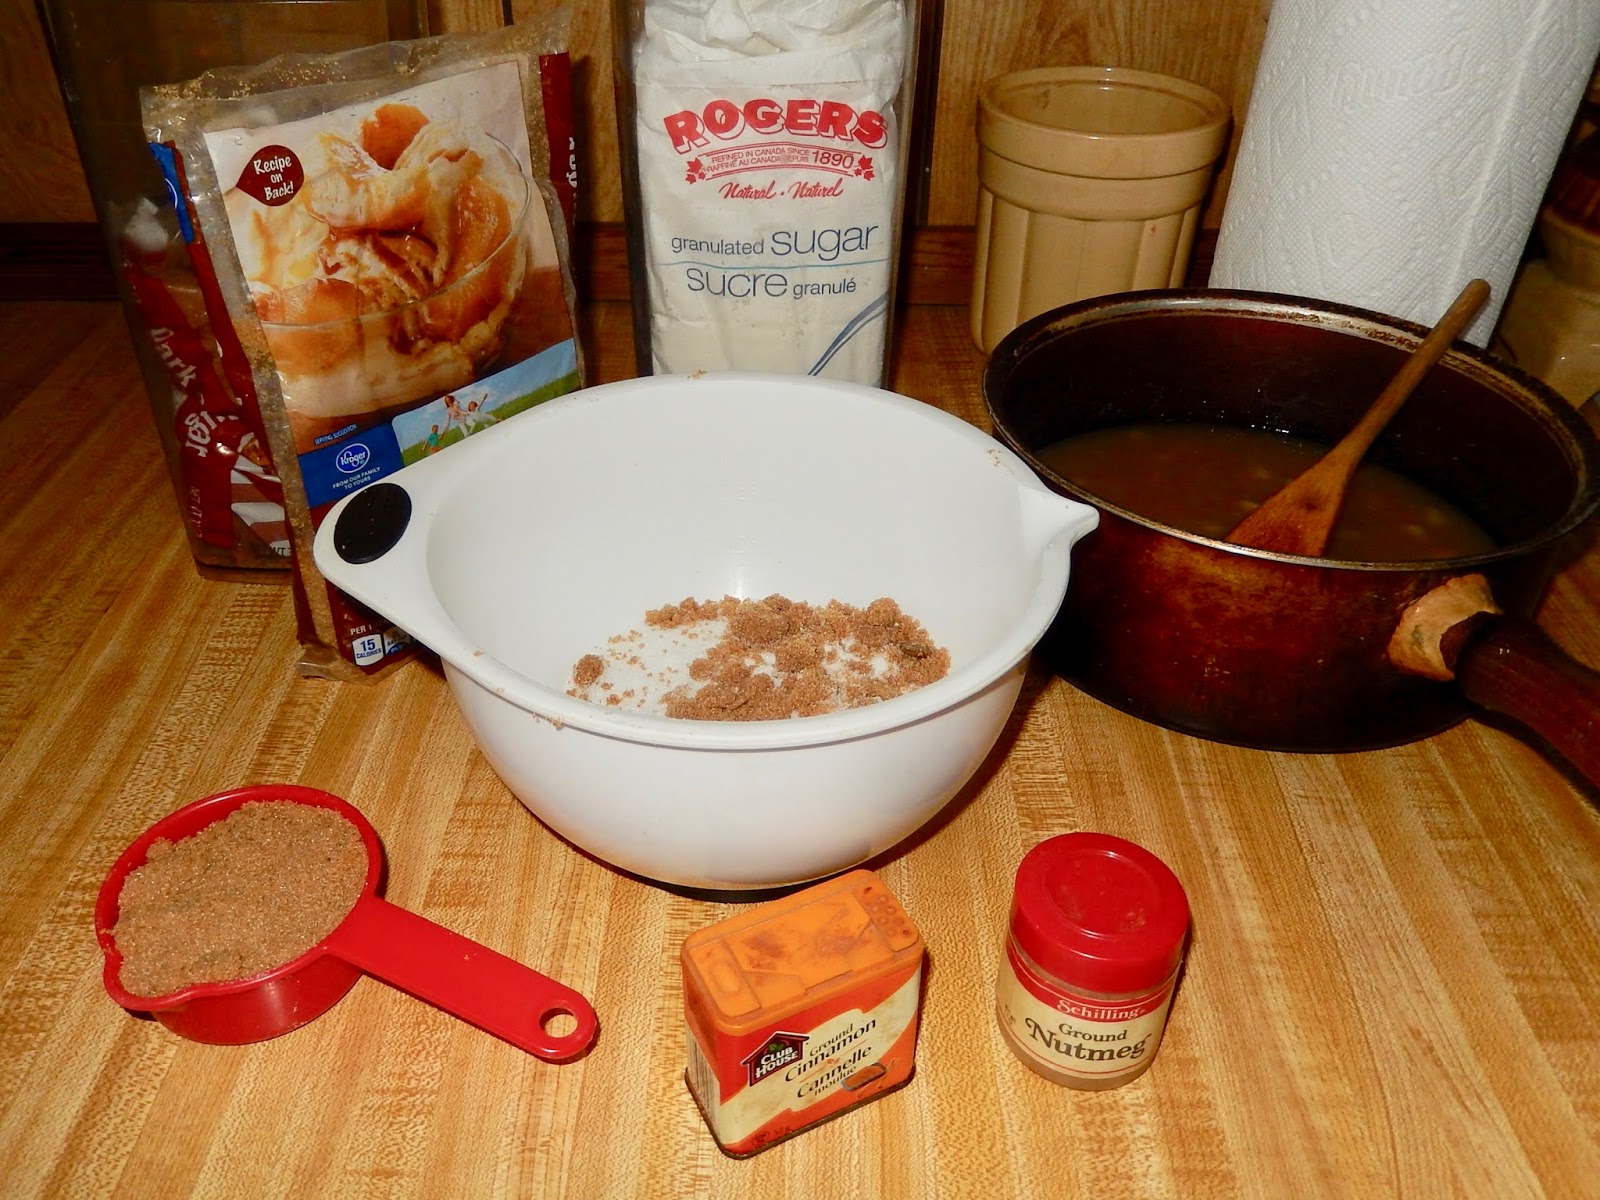
Organizing my ingredients and equipment.
After following comments on the Safe Canning Recipes Facebook Page, I wanted to try Apple Pie Filling. I chose the tested recipe below from the Ball/Kerr website.  Click here to see the original.

I purchased a $5.99 5-pound bag of apples and apple juice from the store. The ClearJel I ordered from Amazon. The other ingredients I already had in my fridge and pantry.

Home Canned Apple Pie Filling

Prepare apples, treat to prevent browning
Ingredients:

• 12 cups sliced apples drained
   (about 12 medium)
• Water
• 2-3/4 cups granulated sugar
• 3/4 cup ClearJel
• 1-1/2 tsp ground cinnamon
• 1/2 tsp ground nutmeg
• 2-1/2 cups unsweetened
   apple juice
Measure ingredients.
• 1-1/4 cups cold water
• 1/2 cup lemon juice
• 7 pint glass preserving jars
   with lids and bands

Directions:

1. PEEL, core and slice apples.

2. TREAT apple slices to prevent browning by submerging them in
Blanch apples.
a mixture of 1/4 cup lemon juice
(or 1 tsp of Fruit Fresh/citric acid) and 4 cups water.

3. PREPARE boiling water canner. Heat jars in simmering water until ready for use. Do not boil. Wash lids in warm soapy water and set bands aside.

4. BLANCH apple slices, working
Cover blanched apples to keep warm.
with 6 cups at a time, in a large pot of boiling water for one minute. Remove with a slotted spoon and keep warm in a covered bowl.

5. COMBINE sugar, ClearJel, cinnamon and nutmeg in a large stainless steel saucepan. Stir in apple juice and cold water. Bring to a boil over medium-high heat,
Cook mixture then add apple slices.
stirring constantly, and cook
until mixture thickens and begins to bubble. Add lemon juice, return to a boil and boil for 1 minute, stirring constantly. Remove from heat. Drain apple slices and immediately fold into hot mixture. Before processing, heat, stirring, until apples are heated through.

Fill and process jars.
6. LADLE hot apple pie filling into hot jars leaving 1-inch headspace. Remove air bubbles. Wipe rim. Center lid on jar. Apply band until fingertip tight.

7. PROCESS jars in a boiling water canner for 25 minutes, adjusting for altitude. Remove jars and cool. Check lids for seal after 24 hours.

Making apple sauce and a juice drink.
I then cooked the skins and cores to put through my food mill for two half pints of applesauce. I processed the jars for 15 minutes in the hot water after the pie filling.

Lastly, I simmered the remains in the water I saved from blanching the apples.  I strained the liquid and added sugar and cinnamon to taste. Since this wasn't a tested recipe, it went in the fridge to drink right away.

My apple canning canning results.

That's how I stretched a five pound bag of apples to the max. The total was six pints of apple pie filling, two half pints of applesauce and one quart of apple juice drink. Next year I need to find an abandoned apple tree for even more savings. -- Margy

Sunday, July 15, 2018

Red Currant Jam

Last year I planted a small bare root red currant. This year it’s grown considerably and developed clusters of berries on previous year’s branches. I was surprised at how many. Last week they all started to ripen at once.

I’ve tasted a few and found them too sour to eat raw. The label said they make good jelly, wine and preserves so I thought I would try.


Removing seeds in a food mill.
Red currants contain a lot of seeds, they’re edible but I didn’t want them in my jam. I washed the tender berries then warmed them in a saucepan while crushing with a potato masher. Still warm, I processed them in a food mill to remove the seeds.


Half seeds, half pulp.
From two cups of mashed berries I got one cup of pulp and one cup of seeds to be discarded.

I added one cup of sugar and one tablespoon bottled lemon juice to my one cup of juicy pulp. Because the berries are tart, no pectin was needed.

Cook until jelled at 220 degrees Fahrenheit.
I heated the mixture to a rolling boil and kept it bubbling until reaching 220 degrees Fahrenheit (the jell point). Because I was using a small pan, it was hard to keep the thermometer away from the bottom so I backed it up with the cold-water test for jelly.


Result, one half pint of jam.
I prepared two half-pint jars and my small water bath canner, but in the end I only got one half-pint jar of jam.

I chose to use it as refrigerator jam. Maybe next year I’ll get a bigger crop to make enough to put up for the pantry.

I'm pleased with the taste. It's a tart tang, but not sour like the raw fruit. The label on the bare root stock was right. The fruit does make a good jelly or preserve.


Do you grow red currants? How do you like to use them? -- Margy

Saturday, February 03, 2018

Canning: Pressure Canning Potatoes

I grow potatoes in a hillside potato patch created from compost. I also grow potatoes in containers on the deck. I harvest in August or early September then store my crop in open plastic trays under the guest bed downstairs.

This year I got four trays of potatoes. We've eaten one and one I'm saving for seed potatoes.

Rather than letting them all sprout, I decided to preserve one tray full in my pressure canner.

I follow a Safe Canning Recipes Facebook page. They have a blog with links to safe tested canning recipes.

I've had a Presto pressure canner for months but have been afraid to use it. I was recently inspired to try canning potatoes. 

I used a recipe from National Center for Home Food Preservation and a link to basic safe canning procedures. Refer to them for full directions.

Canning White Potatoes

Procedure:

Wash, peel, place in ascorbic acid solution
Wash and peel potatoes. Place in ascorbic acid solution to prevent darkening. If desired, cut into 1/2-inch cubes. Drain. Cook 2 minutes in boiling water and drain again. For whole potatoes, boil 10 minutes and drain.

Cook and rinse.
Add 1 teaspoon of salt per quart to the jar, if desired. Fill jars with hot prepared potatoes, leaving no more than 1-inch headspace.

Place potatoes in sterilized jars.
Cover hot potatoes with FRESH boiling water, leaving 1-inch headspace and covering all pieces of potato. (Do not use the water you cooked the potatoes in; it contains too much starch.)

My float cabin is less than 1000' in elevation so I processed the jars for 35 minutes at 11 pounds of pressure. Follow this link for detailed processing times.

I got eight pints from my tray of Yukon Gold potatoes. We'll keep these on the shelf to eat after the remaining basket of fresh potatoes is finished.

These will get us through several months while waiting for a new crop.


Do you use a pressure canner? What kinds of foods do you put up for your pantry? What are some of your family's favourites. -- Margy

Saturday, January 27, 2018

Canning: Carmel Apple Jam

I’ve been saving apple skins and cores in the freezer. My plan was to make Apple Peel (Scrap) Jelly but I didn’t want to waste the flesh clinging to the skins. I found a recipe for Carmel Apple Jam at Canning Homemade through the Safe Canning Recipes Blog that looked more interesting.

Carmel Apple Jam

Preparing the apple.
Ingredients:

6 cups diced peeled apples
½ cup water
1 package powdered pectin
2 cups granulated sugar
1 ½ cups light brown sugar
½ teaspoon ground cinnamon
¼ teaspoon ground nutmeg

Making apple sauce from frozen skins.
Directions:

Preparing the sugar and spices.
Cook apples and water over low heat until soft. Stir in pectin and bring to a full rolling boil stirring constantly. Stir in sugars, cinnamon and nutmeg. Return to a full rolling boil and boil for one minute. Remove from the heat and skim off any foam. Pour hot jam into hot sterilized jars leaving ¼-inch headspace. Adjust lids and process for 10 minutes in a boiling-water bath. Yields 7 half-pints.

My Approach:

Cooking the jam with pectin.
Each time I peel apples (all types) I soak the scraps in a solution of citric acid powder and water to prevent browning. Before freezing I remove any seeds.

Filling the sterilized jars.
When I had enough, I put the peels in a saucepan with half a cup of water. I let them simmer on low for an hour covered and then uncovered until the water evaporated and they were mushy.

I processed the softened scraps in a food mill. The result was a thin applesauce. I added one diced cooked Granny Smith apple for texture.

Using my single jar water bath.
I made a half batch following the recipe except I increased the cinnamon. I love cinnamon.

I’m very happy with the results. The taste is rich and not overly sweet. Next time I’ll use two diced apples to go with my scraps. I’ll also cook the apple cubes longer and mash them to a smoother consistency.

Carmel Apple Jam topping on my yogurt.
Carmel Apple Jam is good on biscuits, toast and as a topping for yogurt and ice cream.

Do you have any favourite recipes for apples or apple scraps? -- Margy

Saturday, September 23, 2017

Canning: Cowboy Candy

Jalapeño peppers on my plant.
I follow a Safe Canning Recipes Facebook page and have been inspired to try new things. On their blog there are many safe tested recipes, including one for something called Cowboy Candy.

It’s a recipe for sweet pickled jalapeño peppers. Everyone raves about them and I’m a hot pepper fan. So, I decided to give them a try with peppers from my own plant. Click here and scroll down to read the recipe online.

Cowboy Candy

Ingredients:

Organize your ingredients.
3 pounds jalapeño peppers
2 cups 5% cider vinegar
6 cups white granulated sugar
1/2 teaspoon turmeric
1/2 teaspoon celery seed
3 teaspoons granulated garlic
1 teaspoon cayenne pepper

Directions:

Use gloves, it really helps.
Using gloves to protect your hands, slice off and discard the stem ends. Slice the peppers into uniform 1/8 – 1/4 rounds.

Bring syrup to a boil.
Bring vinegar, sugar, turmeric, celery seed, granulated garlic and cayenne pepper to a boil. Reduce heat and simmer for 5 minutes.

Add sliced peppers and simmer for exactly 4 minutes.

Use a slotted spoon to transfer peppers to clean, hot, sterile jars. Fill to 1/4 inch from the rim or the jars.

Add sliced peppers and simmer.
Bring the syrup back to a full boil. Boil hard for 6 minutes.

Ladle the boiling syrup into the jars over the jalapeño slices. Insert a cooking chopstick to remove any air pockets. Add more syrup if needed to maintain a 1/4 inch headspace.

Spoon peppers into jars and boil syrup.
Wipe the rims with a damp paper towel and cover with two-piece lids to finger tightness. Process half-pints and pints for 10 minutes in a water bath canner. Begin timing after the water reaches a full boil. After the time has expired, turn off the heat and let the jars rest in the canner for 10 minutes.

Remove jars with canning tongs and let them rest undisturbed for 24 hours on a cooling rack. When cooling has completed, check seals, clean the jars with a damp cloth, remove the rings, and label.

If you like hot condiments, this is the one for you. If you have extra syrup, you can process that as well. It’s good brushed on BBQ meats.

Jar on the left for preserving and the one on the right for immediate use.

My little plant only gave me enough peppers for one half-pint (with mostly syrup) and a few extras for a jar for the fridge (with the white screw top). I could have packed more peppers into the canned jar I canned, but the extra syrup will also come in handy.

Have you ever made Cowboy Candy? What do you think? -- Margy

Thursday, September 07, 2017

Canning: Salal Berry Jam

Salal leaves are used by florists and the berries can be eaten.
The granite cliff next to our float cabin gives way to forest. In the shade of firs, hemlocks and cedars a green-leafed shrub called Salal thrives.

I've tasted the berries before. They are somewhat dry and bland, but I've heard they can be made into jam. This year I decided to try.

The berries ripen in early August and look somewhat like a blueberries. I picked enough to make one jar of jam just in case it wasn't to my liking.

Here's the recipe I used to make my jam without pectin.

Salal Berry Jam

Ingredients:

Separating and cleaning berries.
1 cup salal berries
1 cup sugar
1 tablespoon lemon juice

Directions:

Mashing half of the firm berries.
Picking salal berries is sticky work. I found it easiest to pick the whole bunch at the branch tips and separate and clean them at home in water.

Combine all ingredients and heat.
Mash half of the berries to release the juice.

Combine all of the ingredients in a pot that is wide at the bottom and large enough for the sugary mixture to bubble up without running over.

Fill leaving 1/4" headspace.
Cook until the mixture reaches 220 degrees on a candy thermometre.  To ensure the jam has reached the jell point you can test it in several ways. I used the plate method. Drop a teaspoon of jam onto a cold plate and let it sit for 30 seconds. Tilt the plate. If it moves slowly, it's ready.

If you want to make your jam shelf stable for storage, use the water canning method. Here's a link to full instructions at the Ball/Kerr website. 

Fill the jar leaving 1/4" headspace. Wipe the rim and cover with a two-piece lid and ring.

Process the jar in a boiling water canner for 10 minutes. Start timing after the water reaches a full boil. Adjust the time for your altitude if needed. I have a one jar canner that's perfect for small batches.

Small canner for up to one pint.

Turn the heat off and remove the canner lid. Let the jar rest for 5-10 minutes. Use tongs to remove and let the jar cool naturally. Listen for the pinging sound to let you know the jar has sealed.


After 24 hours, check the lid to make sure it doesn't flex up and down when pressed in the center. If it does the jar didn't seal and the jam needs to be refrigerated for immediate use. If the seal is tight, remove the ring and wash the jar before storing in a cool, dark place.

The consistency is perfect for jam. The flavour is strong but not unpleasant. It was plenty sweet, but next time I would use more lemon juice to counteract the bland berries.

Do you preserve foraged foods? What are some of your favourite recipes? -- Margy

Saturday, July 29, 2017

Canning: Homemade Garlic Dill Pickles

This year I grew two key ingredients for my dill pickles. Of course, the first was pickling cucumbers. The other was dill. I picked up a seedling at the nursery. Boy has it grown and do the bumblebees love it.

I selected a recipe from my favourite Facebook group's website Safe and Smart Canning Recipes. It's a group that provides lots of assistance to experiences people and those of us just learning the art of canning. Here is the complete recipe. I only had enough cucumbers to fill two pints.

Garlic Dill Pickles

Ingredients:

16 pickling cucumbers (depending on size)
2 cups apple cider vinegar
2 cups distilled white vinegar
4 cups water
5 tablespoons pickling salt
2 peeled garlic cloves per jar
1/4 teaspoon crushed red pepper per jar
1 teaspoon dill per jar
1/2 teaspoon black peppercorns per jar

Directions:

In a large pot combine the vinegar, water and salt. Bring to a simmer. Arrange jars on counter. Place the spices and in the bottoms of the jars.

Wash and slice the cucumbers. You can slice them any way you prefer: coins, spears or chunks. Pack the slices firmly into the jars, leaving as little space in between them as you can.

Pour the brine into the jar, leaving 1/2 inch head space.

Wipe the rims, apply warm lids and rings, and process in a boiling water bath for 10 minutes. Promptly remove the jars from the pot and allow them to cool on a towel placed on the counter.

Make sure each lid has sealed (you will hear the popping sound as each jar seal). After 24 hours press down on each lid to make sure they do not pop back up. If they do not, the process is complete.

Garlic Dill Pickles

I followed the recipe but used my own fresh dill heads rather than the dried dill. These were easy dill pickles to make. Now all I have to do is wait for them to absorb all the flavours before enjoying my homegrown, homemade garlic dill pickles.

Do you make pickles? What are some of your favourite recipes? -- Margy