
Float Cabin Living: How was your cabin built? Float Construction
Float Construction
A house is only as good as its foundation. The same is true for a float cabin. Even more so.
 |
| Our cabin's float during construction in 1997. |
The float is the most critical component of cabin construction. It must be skookum (strong). It has to float high enough out of the water to support the weight of the cabin and everything else you put on board (and that builds up over time!). If your float sinks too low or off balance, there goes your cabin.
 |
| Looking under our cabin at the lashed float logs. |
John made our float with logs from an old float he deconstructed.
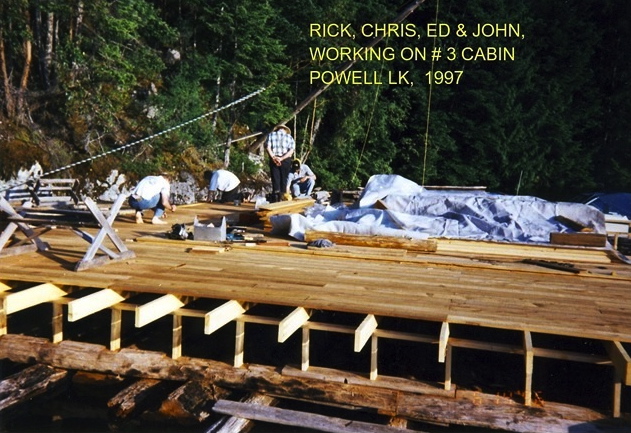 |
| John, his dad Ed, brother Rick and nephew Chris at work. |
Read "Never Saddle a Dead Horse" in Up the Lake for the details. We purchased our cabin already built, but got to watch the process when John constructed his own replacement cabin.
 |
| Building a new float at Cabin #5. |
These are the logs John purchased for his new cabin. You can see the logging company stamps. Two brow logs are placed on top and perpendicular to the float logs.
 |
| John's dog Bro standing next to a brow log stitched in place. |
Then a long heavy steel cable is wrapped over the top of the brow log and under and around each float log. Over, under, over, under. Once in place, the cable is tightened with a winch and hammered in place with railroad spikes.
 |
| The cabin foundation is supported by additional logs and posts. |
Additional perpendicular logs are attached to the float logs so upright boards can be added to support the cabin foundation and decking. It's important not to attach your cabin floor or deck to the brow logs, or allow the cabin floor to extend over them, to allow for repairs in the future if needed.
 |
| The cabin floor is installed first. |
First comes the floor for the cabin. John uses 3/4" plywood. If we built another cabin for ourselves (which we won't), I would insulate the floor. The cabin cools from the bottom up.
 |
| The plywood cabin floor is added first. |
And 1x6" cedar boards are used for the decking because they are the longest lasting.
 |
| Bro surveying the new cedar deck. |
A small space is left between the cabin floor and decking. That makes it easier when it's time to replace the deck, usually in about 20 years. Once the deck in in place, cabin construction can begin.
After time, even cedar float logs become saturated. This causes them to sink farther into the water. Then they become even more saturated. It's a vicious cycle. To prevent this, additional flotation is needed. Way back, more cedar logs were shoved underneath by big boats or tugs. We saw evidence of this practice on an old float at Rainbow Lodge.
 |
| Sink a barrel to place it under the float then filled it with air. |
Today, plastic barrels, totes and Styrofoam are used. Fifty-five gallon blue barrels are the most popular, but 300-gallon totes are becoming more common. Unfortunately, their aluminum frames tend to disintegrate after five or so years.
 |
| A blue barrel tucked under two float logs for extra flotation. |
Following winter storms, you find a few blue barrels floating on the lake. They have a tendency to pop out when cabins rock and roll in wind and waves. A common winter pastime is beachcombing for barrels. Who knows, the barrel you find may be your own!!
Here are more posts about float construction and maintenance:
Extra Flotation Power
Adding Flotation Barrels Under the Cabin
Pumped
Mr. Fix-It Man
Log Burning for Dry Rot
Cabin Deck Refurb
Cable Up - Anchoring System
Float Cabin Anchor Cable Repair #1
Float Cabin Anchor Cable Repair #2
 You can also read more about float cabin construction in Wayne's Coastal BC Stories book Cabin Number 5. It follows along as John built the replacement for his original Cabin #1. -- Margy


Fascinating post and great photos for the construction of a floating house ~ We have them on Cape Ann MA but never saw how they are built ~ Love your doggie, too!
ReplyDeleteHappy Times to you,
A ShutterBug Explores,
aka (A Creative Harbor)
Right now several people are building replacement cabins so we get to see how it is done. - Margy
DeleteVery interesting. It sounds like keeping the float maintained is a lot of work and it's so very important to be on top of it (no pun intended).
ReplyDeleteYes, the float is the most important part of our cabin. - Margy
DeleteVery interesting!
ReplyDeleteHave a great week!
Thanks for stopping by and taking the time to comment. - Margy
DeleteWhat a fascinating read Margy - thank you so much for sharing the construction process. I'm coming back to Vancouver Island soon for your Summer and looking forward immensely to once more exploring that stunning part of our world with my Nikon!
ReplyDeleteI had a great trip last month to Vancouver Island and up to Tofino. What an amazing spot for photography. - Margy
DeleteSo nice to see pictures of Bro. I was thinking of him today. And there's still a part of me that wants to jump into a construction project. When I was 15, my parents bought a lot on the backside of our local mountain in Kelowna, BC, and Dad taught us how to build a house, with lots of help from his friends.
ReplyDeleteAll the best to you and Wayne.
Kay
An Unfittie's Guide to Adventurous Travel
My dad did lots of architectural drawings when we added a den to our home. I learned a lot from that and still love to make plans for projects. He also did woodwork making cabinets, lamps and such. We learn so much from our dads. - Margy
DeleteThat truly is amazing!
ReplyDeleteAnd so is John. - Margy
Delete