Tuesday, November 29, 2016

Enlarging our Log Boom

The log boom before.
Over the last two years we’ve undertaken several major projects to improve the quality and safety of our float cabin.

Our most recent improvement project was to add more logs to the protective log boom on the south side of our cabin. This boom protects us from wind waves and wakes from passing boats.

Swells break on their outer surface, calming the water that enters the area next to our cabin.

Moving the logs with our tin boat.
When we bought our cabin, the boom was only two logs deep. Over time, we added a new log here and there.

But this fall, we added two complete rows. Now we have a substantial barrier to make our floating home safer.


A local logging company was selling old boom logs that had been used to corral and move logs on the ocean.

John poling the logs into place on the boom.

When they were no longer useful for that purpose, the retired logs were dragged up on shore where they dried out and became more buoyant.

Wayne and John chaining the logs together.
We went together with another cabin owner to purchase and share the logs.

Our good friend John helped us with the installation.

Each log was towed into place and attached with chain to the neighbouring log. The result was a boom of logs linked together both lengthwise and crosswise. That way they float as a unified group.

John and Mike secure the anchor to the boom with heavy rope.
The last step was to drop an anchor to hold the logs away from the cabin. Our barge and our good friends John and Mike came in handy for that step.


The log boom after, more substantial and safer.
Now when the wind blows, or the boats roar, we can float a little easier in our cabin up the lake. -- Margy

Saturday, November 26, 2016

Preserving: Making Yogurt in a Thermos

I enjoy yogurt for breakfast and on fresh fruit, so I went to my cookbook library to learn how to make it. While most people are going digital, living off the grid makes print books a valuable resource.

Thank goodness people send their old cookbooks to thrift stores for me to find. Two resources gave me what I needed: Stocking Up by Organic Farming and Gardening and my trusty Fannie Farmer Cookbook.


Using a wide mouth thermos is a simple way to incubate yogurt. I found one at my favourite thrift store for $1.75.

Ingredients from Stocking Up:

1 quart milk (regular or skim)
¼ cup commercial plain yogurt with active cultures

That’s it. Pretty simple. Since I could only incubate three cups, I reduced the recipe proportionally.

Tips say: Use milk and starter no older than five days. Use your last batch as the new starter, but it can weaken over time. After 4 batches, start over with a commercial yogurt.

Whisk milk while heating to almost boiling. Cool to lukewarm (105-115°F).

Tips say: If milk is too hot, it will kill the yogurt bacteria.

Add yogurt starter and gently stir until well mixed.

Tips say: Using too much starter can make your yogurt watery.

Use lukewarm water to warm the thermos then drain.

Pour the yogurt mixture into the thermos and secure the lid. Place in a warm (110°F) location to incubate for 4-6 hours. I covered my thermos with a thermal sock and placed it near the woodstove to stay warm.

Tips say: Don't move or bump or the yogurt may separate into curds. If it incubates too long it can become watery. The longer you incubate the yogurt the sourer it will get.

Open the thermos. The yogurt should be custard like. Transfer to a sealed container and refrigerate for three hours before eating.


Tips say: Yogurt will get firmer during cooling. Homemade yogurt tastes sweeter than commercial yogurt.

My first batch came out so well I made a second. I accidentally knocked thermos on the floor. The yogurt did separate. It tasted fine, I just had to stir the liquid whey back in before eating.

Do you make yogurt? What tips can you share? -- Margy

Wednesday, November 16, 2016

Coastal BC Fungi: Elfin Saddle

Elfin Saddle

Elfin Saddle with covered compost pit in background.
I haven't been up to my hillside potato patch since I dug them in early October. At that time, I dug a big pit and emptied my compost barrel inside. Last week I went up to add garden trimmings and saw a black mass on the ground. My first thought was a bear had come to partake of my compost. Instead, I discovered was an unusual mushroom.

A clump of Elfin Saddles, one with a stem showing.

It was an Elfin Saddle (Helvella lacunosa). It's also known as a Slate Gray or Fluted Black Elfin Saddle. It was obviously old by mushroom standards. The black irregular cap was intact, but the stem had holes and was bending over. Elfin Saddles are usually solitary. When I looked nearby I found two more.

The large mass at the side shows a stem that has collapsed.

They are often found in disturbed ground (like my compost pit). They are common in Europe, eastern and northern North America, and along the west coast. The caps can be white to blackish gray with a folded, convoluted shape (kind of like bear poo at first glace). The stem is very distinctive with long, grooved ribs and holes indenting the surface.

Another specimen in a nearby thicket, also old and collapsed.

They appear in fall after heavy rains. October for us was extremely wet with many downpours. They prefer Douglas fir forests or areas of older brush. Mine were at the edge of the forest.

A closeup of the stem showing ribs and holes.

References say it is edible, but only young specimens and if cooked. Older ones can have poisonous properties. Caution is also given to be careful in identification because it can be confused with other poisonous varieties.

Here is a video by Richard Powell discovering a patch of Elfin Saddles on Vancouver Island. He's an amateur mycologist (he studies fungi) and has a very interesting blog called 100 Mushrooms on Vancouver Island. In addition to pictures, he includes lots of videos.


And here's an interesting tale about a mushroom hunt involving Elfin Saddles (Helvellas) by Anna at Crazy about Mushrooms. -- Margy

References: The Savory Wild Mushroom by Margaret McKenny and revised by Daniel E. Stuntz (University of Washington Press, 1971), and www.MushroomExpert.com (online).

Tuesday, November 15, 2016

Rebroadcast of Our Float Cabin on UNIS Television

Wayne and I were honoured to host a film team from Red Letter Films at our Hole in the Wall float cabin home in July 2014. Evelyne and her film crew including camera technician Catherine (Cat), and assistant camera tech Creighton (Crey), spent a whole day with us up the lake getting to know what off the grid float cabin living was like.

The results called Chalets de la Cote Ouest (West Coast Cottages) will be rebroadcasting on UNIS, a Canadian television channel focusing on French-speaking audiences from British Columbia to the Atlantic provinces.

Click below to go the the video link. This is a screen shot.

Our float cabin home is featured in the second segment that is rebroadcasting as follows:

or check your local listing.

It should be available (in French only) on the UNIS website after the first airing date. Click here to go to the video page and click on the arrow next to "Voir la video."

Sharing our lifestyle has been fun. This was our second televison production. The first was for Extreme Houseboats on the Travel Channel. Unfortunately this online video is blocked in Canada. -- Margy

Sunday, November 13, 2016

Moonrise Under the Treetops

Powell Lake, BC, is our home. We live right on it's surface in a cabin floating on logs. It can be a pretty choppy place, especially when the wind blows or boaters leave wakes behind.


But near our cabin at the entrance to a spot called Hole in the Wall, it's usually pretty calm. I love the reflections that develop. Here's one of the moon coming up "under" the treetops across the bay.


There was just enough movement to the water's surface to make it look like a watercolour painting if you turned the photo upside down, or is that right side up?

Want to know more about cabin life? Take a look at the category called Float Cabin Living.

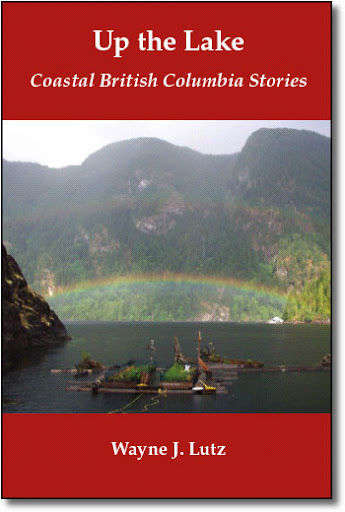
Wayne's book Up the Lake tells the story of our first years "up the lake."  You can get it free for e-readers at Kobo, Amazon.com, Amazon.ca, and most online book sellers. If you enjoy it, there are twelve more titles in the Coastal BC Stories series. -- Margy

Saturday, November 05, 2016

Coastal BC Insects: Hover Fly

A tiny Hover Fly on a marigold.
There are lots of mimics in the animal world. Watching flowers, you see many insects taking advantage of their pollen and nectar. From a distance, we sometimes assume they are all bees, but on closer inspection that’s not always the case.

A larger Hover Fly sharing the marigolds.

Some Hover Flies mimic wasps in shape and colouring, but don’t sting. Wasps have long antennae and a cylindrical abdomen, while Hover Flies have short antennae and a flattened abdomen.

Hover Flies are attracted to flowers just like bees and assist in the process of pollination. They are especially good to have around with the recent problems we’ve had with the decimation of bee populations.

Syrphus torvus Hover Fly.

Larvae of Hover Flies often feed on aphids, an added bonus to have them around your yard and garden.

There are many varieties of Hover Flies. The larger one above I believe is called Syrphus torvus. It’s very common in Europe, Asia and North America, and can be found throughout Canada.

Sphaeronphoria scripta is a small Hover Fly.

Here’s another kind of Hover Fly enjoying my marigold flowers. I didn't realize that there were so many different kinds. It’s also a wasp mimic. I believe it is a variety of Sphaerophoria, possibly a Sphaerophoria scripta. It has worldwide distribution, so it's probably a good guess. I believe this is a female based on the fuller abdomen. Males have a long, slim shape.

Notice how the wings look at rest.

References: Bugs of British Columbia by John Acorn and Ian Sheldon, BugGuide.net (online), and the Etomology Collection of the University of Alberta. - Margy

Thursday, November 03, 2016

Canning: Spiced Canned Apples

Spiced Canned Apples
I’ve been canning a lot this year, mostly things from my garden. I wanted to make some spiced canned apples, I don’t have an apple tree. I priced of apples at the store and decided to forget it, until my good friend John gave me a bag of gleaned apples from the tree in the Dodd Lake campground.

Using free gleaned apples.
I’ve made spiced canned apples before, but looked at recipe online for ideas, then used the tested one from my Farm Journal's Freezing and Canning Cookbook.

I peeled and sliced the apples, placing them in water with lemon juice to retard browning.

I chose to make medium sugar syrup. Next time I’ll use thin syrup to make them less sweet. Here are the proportions from the cookbook:

Sugar Syrups for Canning
Type
Sugar Cups
Water Cups
Yield
Thin
2
4
5
Medium
3
4
5 ½
Heavy
4 ¾
4
6 ½


Draining apples.
I put 6 cups of water and 4 ½ cups of sugar (one and a half time the medium amount) to make sure I would have enough for all of my apples. I heated it to boiling in a large pot and added spices (1 teaspoon allspice and 2 teaspoons cinnamon) tied in cheesecloth. This kept the dark ground spices out, but allowed the flavours to infuse the syrup.

Cooking the apples in syrup.
Next I drained the sliced apples, added them to the boiling syrup, and cooked them for 5 minutes. In the meantime I was preparing my water bath canner and sterilizing my pint jars. To keep the jars warm until the moment of filling, I put them in the oven at 250°F.

Filling canning jars.
Just before filling, I added one cut to fit cinnamon stick to each jar. I ladled the cooked apples into each jar and filled them with hot syrup to ½” head space remaining. Sterilized lids and rings closed each jar, and they were processed in a water bath canner for 15 minutes.

Into the water bath canner for 15 mintues.
After five minutes rest in the hot canner, they were placed on a towel to cool and seal. I love to hear that distinctive snap.

I had enough apples for five pints with a little bit extra, and there was syrup left over. I decided to add a few more diced apples to cook down into applesauce.

Mashing remaining apples for applesauce.
I simmered them in the sauce and then used a potato masher to make chunky sauce. I filled half-pint jars with ¼” head space they went into the water bath canner for fifteen minutes.

Waste not, want not. I use propane tanks to power my stove, so reusing a large pot of hot water is a real savings.

Five pints of Spiced Canned Apples and three half-pints of chunky applesauce.

Now I have five pint of spiced apples and three half-pints of applesauce to enjoy as winter progresses. And, I know where to go next year to get even more apples. Thanks John! -- Margy

Tuesday, November 01, 2016

Yvonne Maximchuk: Painter, Potter, Author

Drawn to Sea by Yvonne Maximchuk
I love to read about Coastal British Columbia. I found a book in the BC Ferries gift shop called Drawn to Sea: Paintbrush to Chainsaw – Carving Out a Life on BC’s Rugged Raincoast by Yvonne Maximchuk and bought it on the spot. The cover is one of her paintings of our magnificent coast. (Click here to read my review).

I’m a nosy kind of reader. I want to know more about authors I enjoy, especially strong independent women. I found her website and Facebook pages.

Yvonne at Okeover Inlet near Powell River.

A month ago I saw she would be in nearby Comox giving watercolour classes. I inquired about book events. She said no, but maybe we could get together. Wow! I know she's lived in a floathouse, so I invited her to spend the night in my float cabin on Powell Lake.

Up at the float cabin on Powell Lake.

I met her at the ferry and we hit it off right away. After checking in with Wayne, we headed to Magpie’s in Cranbrerry for lunch, then drove up to Lund. We stopped at Okeover Regional Park, the Tug Ghum gallery, and Nancy’s Bakery for cinnamon buns.

Back at the Shinglemill Marina, we got in the Hewescraft for the 25-minute boat ride up to Hole in the Wall. At the float cabin we enjoyed a leisurely dinner with fine wine (thanks to Yvonne) and talked the night away – woman talk like woodstoves, electrical systems, gardens, writing, and life in Coastal BC. Having a guest who understands me and my lifestyle was unique.

The artist in action.

The next day we took the boat around Goat Island. Even with the cloudy skies and showers it was a grand tour. We even met up with our good friend John and Wayne along the way. They say time flies when you are having fun, and my weekend with Yvonne was just like that.

Check out Yvonne’s books. Drawn to Sea is her memoir, and she has co-authored books with Billy Proctor, Echo Bay’s most famous resident.

Yvonne sketching my float garden.

And her artwork is amazing. While Yvonne sat on my front porch, she sketched my float garden in her journal. I’m so honoured.

Information about Yvonne Maximchuk:

www.yvonnemaximchuk.com
Yvonne Maximchuk on Facebook
Yvonne Maximchuk; Painter, Potter, Author

Books by Yvonne Maximchuk:

Drawn to Sea a memoir by Yvonne Maximchuk
Full Moon, Flood Tide by Bill Proctor and Yvonne Maximchuk
Tide Rips and Back Eddies by Bill Proctor and Yvonne Maximchuk
Colour the British Columbia Coast a colouring book by Yvonne

Artwork and Pottery by Yvonne Maximchuk:

Paintings by Yvonne
Pottery and Prints
Books and Cards
Art retreats at SeaRose Studio in Echo Bay

Thanks Yvonne. You are a great author, talented artist, and now I can count you as my friend. -- Margy