Thursday, April 30, 2009

Quad Ride to Poki's Place

If you live in Powell River, it's likely you knew Poki. He was an avid ATV rider and trail builder, but his life was cut short by cancer. In his honour, the shelter at Giavanno Lake was christened "Poki's Place."

Poki's Place is a frequent destination for local riders on weekends when logging roads are open to the public. That was the destination Wayne and I picked for a ride last Sunday.

We drove through Cranberry and then out Duck Lake Forest Service Road. Just after the end of the pavement we found a turnout large enough for our truck and double quad trailer. The ride gave us a chance to try out the new ATV Trail Guide written by the PRATV Club President Dave Hodgins. We figured with the great maps, directions and GPS coordinates, we couldn't get too lost on our own.

From the Duck Lake Bridge we headed east on Duck Lake FSR Branch 1. At 7.1 km there is a well marked intersection that turns you left onto East Haslam Main. In another 10.1 km, you reach the intersection with Giavanno Main. From here there are two entrances to choose from, one at 2.7 km and one at 3.7 km up Giavanno Main. We chose the second with a well build quad bridge put in place by the Wednesday Trail Building Group. The trails into Poki's Place are maintained by this group of very dedicated volunteer workers.

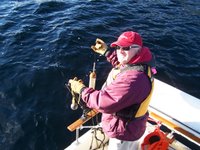
After a picnic lunch and a little fishing we left by the Fiddlehead Trail. This trail starts over a rustic split cedar bridge, again built by the Wednesday Group. The trail is easy to moderate, with only a few uneven and boggy spots. The ride through the trees was beautiful, and there was no dust like on the busy mains. The end of the Fiddlehead Trail junctions with the Haslam Main at the head of Haslam Lake. Turn left and follow East Haslam Main back to your starting point.

It was good to see so many people out on a sunny weekend enjoying the roads and trails in the Powell River back country. That is one of the benefits of living here on the BC coast.

Would you like a book of maps for ATV trails in the Powell River area? The ATV Trail Guide will be on sale at the PRATV General Membership Meeting on May 14 at 7:00 pm in the Popular Room at the Powell River Complex. If you want to become a member, this is enrolment time. If you are already a member, we hope to see you there. -- Margy

Wednesday, April 29, 2009

Save me a Seat at the Olympics

The 2010 Winter Olympics are coming to Vancouver, BC. I've shared this humorous sign before, but I think it is just too funny not to share again. Along Highway 101 just south of the Earl's Cove ferry terminal on the Sunshine Coast, there is a homemade sign with a unique Olympic announcement.

The author is obviously making reference to the cost of tickets. Most start at $50 and go up into the hundreds very quickly. Want to see the opening or closing ceremony? Those start at $175 and go up to over $1000 (a seat!). I can see why he chose this particular analogy. It may be the only seat at a reasonable price, even if you get through the whole process.

We tried to get tickets in the fall lottery, but no luck. The next opportunity for tickets is in June. Canadian sales are online or by phone. International sales are handled by agents authorized by the National Olympic Committee. Wayne and I still want to attend a few events. Hope they save us a "good" seat! -- Margy

Sunday, April 26, 2009

Hillside Potato Patch

I finished my spring planting this weekend by putting seed potatoes into my hillside garden. Over the years, I've created a small plot of soil high on the rocky cliff using compost (you can see my simple wire mesh pile), mulch from the forest, and peat moss. It has become my potato patch. They can take the partial shade and the critters seem to leave them alone. For this garden to thrive, we first had to solve the soil problem, but then we had to solve an even heavier one, water.

To get to my hillside garden, I have to climb four sections of stairs. Our good friend John came to the rescue and designed a simple rain water capture system. They key component is a 55 gallon blue barrel for water storage. Rainwater is collected by a large tarp suspended between the trees. One corner of the tarp is connected to a large funnel that fits into the hole on the top of the barrel, and a long 2X4 keeps everything in place. We have some very strong winds at our cabin, but the tarp has remained in place for over three years. A hole was drilled near the bottom a faucet has been inserted. This attaches to a hose that runs downhill, providing the water pressure needed for a spray nozzle.

If you live in an area that gets substantial rain, this might be a good system for you. If you have a roof handy, you don't even need the tarp as a collector. Rainwater is excellent for gardening. It is pure, soft and without added chemicals. And did I forget to mention, it's FREE!

Do you have any gardening tips to share? I'd love to hear them. - Margy

Saturday, April 25, 2009

Jess On a Hot Tin Roof

Fall and winter have been quiet times up the lake. Most cabin owners secure their dwellings for the long cold months and don't return until spring or summer sunshine warms the scene. An exception to this rule (not counting Wayne and I) is our friend across the Hole named Jess. That's what we call him, but others know him by his given name, Justin.

All winter, Jess has been rebuilding his tiny 8X10 (pretty as a picture he says) cabin into a larger version with a loft. He's almost done, but this spring he has switched his efforts to a new structure on a separate float. It has gone up amazingly fast, especially with some prefabrication he did in town.

Jess has a skookum (strong) barge-like boat that is perfect for transporting building materials and supplies up the lake. Wayne and I have had fun watching Jess and his assistants raise the building from ground up (theoretically speaking, actually float up). Today Jess was up on his roof giving it some finishing touches.

It amazes me how talented people are here in Powell River. My sheltered city upbringing has made me a specialist rather than a generalist. Goes to show, what is an advantage in one setting can be an overall disadvantage. Wayne and I are learning to be more self reliant, but it's slow and hard work. In the meantime, we watch and learn from locals like our good friend John and our neighbor Jess. -- Margy

Friday, April 24, 2009

Strawberry Leftovers

Last fall I cleaned my floating garden in preparation for winter. I removed one of my ailing strawberry beds, but saved some of the healthy plants and a few more that started from runners.

I dug each one up with a generous scoop of soil, then snuggled them close together in one of my large plastic barrels. Amazingly, they all survived the snow (just a little), frozen ground (more than just a little), and chilly winds. Because I used bare root plants for my new bed, my strawberry leftovers were without a home, especially after the zucchini served them with an eviction notice.

I thought about planting them up on the cliff, but watering would be a problem and the pesky woodrat would probably get all of the berries if he didn't eat the plants first. Then I came up with a perfect solution. I went to Canadian Tire and bought two deck rail planter boxes. I like this style because the bottoms are designed to wrap around a railing, so they have very little surface area to trap moisture that can rot the cedar deck. I can also stuff the little troughs at the bottom with rocks to weigh the boxes down. We can get some pretty mean winds during storms. If it's not nailed down, it might fly away!

Now I have some additional greenery on my front deck, and the possibility of tasty red berries. That's much better than climbing the hill, or worse yet, relegating the tenacious little plants to the compost pile. Leftovers anyone? -- Margy

Tuesday, April 21, 2009

Planting Bare Root Strawberries

My strawberry beds are seven years old. They were good producers until last year, so I removed one and cleaned out the second.

Strawberry beds need to be replenished every two to three years. But my main problem is grubs that burrow into the roots during winter. Because my garden floats on a lake, I can't use pesticides, so I decided to move one bed as a part of crop rotation. Maybe I can "outsmart" the grubs for at least one year.

I planted bare roots in the new bed and added some to the existing one to give it a boost. Bare roots are an inexpensive way to get lots of new plants. They are available in the nursery each spring and come in packages of 10-12 roots. Prepare the soil and bury the root up to the crown of small leaves. Mulch around the plants to retain moisture in the soil while the roots get established.

As the strawberries grow, remove any blossoms and runners until the plants have a chance to establish their roots and leaves. Once that has happened, you can let the flowers become berries. Later in the season, let some of the runners produce new plants to replenish your beds for the next season. Over time, the "mother" plants will be replaced by their own "babies."

There is nothing better than walking through the garden and picking a sweet, ripe strawberry to munch while you survey your domain! -- Margy

Sunday, April 19, 2009

Planting Bare Root Asparagus

One of my early garden favourites is asparagus. This year I added a second bed in my floating garden.

You can find multi-packs of asparagus bare roots in the nursery. I got mine at Walmart with 10 plants for $4.97. Because I do intensive gardening in my small beds, I planted my asparagus roots a bit closer than recommended. Here's what they say at HGTV.com.

Dig a 12 inches (30 cm) deep trench and mix compost into the bottom. Create a mound to support each root. Space them about 12-18 inches apart (30-45 cm) for optimal growth. Fill the trench and firmly (but gently) pack the soil over the roots. Watering or rain will help settle the soil.

The rule of thumb is don't harvest any asparagus the first year (some even say the second) after planting. The roots need to stored energy for productive harvests in future years. After the spears emerge from the ground they will continue to grow into large ferns. Do not cut the ferns back until they begin to wither in the fall. You may need to provide them with supports, especially in windy areas. The nutrients generated will be stored in the roots for the long winter's rest.

When it's time to harvest your asparagus, use a knife and cut the spears just below the surface of the soil. The roots will keep producing spears and harvesting can continue until mid-June. After that time let the remaining spears grow into ferns to rejuvenate roots. With just a bit of fertilizer and tender care each year, the long-lived roots will produce yummy veggies for years to come. -- Margy

Wednesday, April 15, 2009

Use It, Don't Lose It

When I'm at the cabin, I think more about how I can re-use things. It's good for the environment, but it's also a handy thing to do. Our cabin is a 25 minute boat ride up the lake. Everything headed there has to be loaded into the truck, unloaded at the marina, carried down the dock, hauled up the lake in the boat, and then carried into the cabin. Anything that needs to be discarded must make the same trip in reverse. Consequently, we compost, recycle and re-use as much as we can.

Last week I shared how I am using rehydrated peat pellets to start my seeds this year. They are working fine, but they tend to dry out quickly. The day after I planted my seeds we had pancakes for breakfast and finished a bottle of pancake syrup. When I started to throw it in the trash (that has to be taken back down the lake), I wondered if I could find a new purpose for the bottle. It just struck me that it might make a good watering bottle for my peat pellets, and it does. The bottle has one of those pop-up caps. One squeeze puts just the right amount of water on each peat pellet to keep it moist for the day. It couldn't be better. Now I can use it, not lose it.

Do you have any suggestions for repurposing household items? I would love to hear your handy hints. -- Margy

Tuesday, April 14, 2009

Cabin Cooking: Family Circle Quick Spicy Doughnuts

This morning I made doughnuts for the first time. I found an easy recipe in the Family Circle Illustrated Library of Cooking (1972). I remember this set of 16 colourful and complete recipe books when they were sold in our local market 37 years ago. I only got Volume 1 back then, but recently increased my collection to 10 with a lucky find at our Economy Shop thrift store. The "Breakfast" section in Volume 2 contained this easy recipe for doughnuts, but like most recipes it was too large for just the two of us. I cut it to one third, and it came out fine with a few adjustments.

Quick Spicy Doughnuts

1 cup pancake mix
1/4 cup sugar
1 teaspoon baking powder
1/2 teaspoon cinnamon
1/8 teaspoon each ginger, nutmeg & allspice
1 egg, well beaten
scant 1/4 cup milk
1 tablespoon melted margarine
vegetable oil for deep fat frying
cinnamon sugar or powdered sugar for sprinkling
  • stir together pancake mix, sugar, baking powder and spices
  • combine eggs and milk, add to dry ingredients and mix well
  • stir in melted margarine
  • if dough is too moist, add a little more pancake mix
  • roll or pat dough on a lightly floured board to a thickness of 1/2"
  • cut with a lightly floured doughnut cutter (I didn't have one so I used a knife and made doughnut sticks)
  • fry in deep hot fat (375 degrees on a candy thermometre) until golden brown on both sides - it goes really fast so be prepared
  • drain on paper towels
  • sprinkle both sides immediately with cinnamon sugar or powdered sugar
Wayne came into the kitchen and said, "I see you have another experiment going." What he meant was, not all of my new recipes turn well. But this experiment was a good one. We ate so many there weren't many to snack on later. But they were so easy, I can make more. Besides, they taste best warm and crispy right out of the frying pan. -- Margy

Sunday, April 12, 2009

Maiden Voyage of the Nirvana II

Wayne loves boats, big and small. Several years ago he purchased a radio-controlled Coast Guard cutter to ply the waters of Hole in the Wall. All was fine until a huge tidal wave (actually a large work boat wake) capsized it. The battery compartment flooded and it never worked well after that.

Last summer we saw a neighbor drive out in his tin boat with a huge sail sticking up. We watched as he launched a radio-controlled sailboat in the narrows. Wayne was hooked. After several visits to Mike's RC World in Bellingham (well worth a visit if you are in the area, especially on car race day) and searching the Internet, he selected the Nirvana II.

The Nirvana II has a 32" hull and is 64" high from the keep to the top of the mast. One of the best things is that it comes almost completely assembled and includes everything you need to start sailing right in the box (except for the 12 AA batteries used for the hand-held controller and boat's receivers). You can choose from red, yellow or blue. If you know Wayne, you know he picked the snazzy red one!

On a sunny day this week Wayne took the Nirvana out for her maiden voyage. The 2- channel FM radio control system lets you control steering and the sail positions independently. They recommend selecting a day with light winds for the first sail. Even in the slightest breeze the Nirvana scoots along at quite a clip. It got all the away across the bay near John's boom before the distance became too great for the radio control unit. Then it was time to jump in the "mother ship" (our tin boat) and head out for a rescue. Living on the water has more than one benefit!

If you are interested in a simple, but professional radio-controlled sailboat, the Nirvana II gets two "rudders up" from Wayne and I. Check it out in more detail at their website sailrcnirvana.com. There are specifications, testimonials and photos. It is available online or through a few affiliated club dealers. Happy sailing! -- Margy

Thursday, April 09, 2009

Peat Pellets

Margaret, my blogging and Powell River friend, wrote a post recently about peat pellets on her blog, Thistle Garden. Peat pellets are compressed disks of peat moss that expand in water to create small "containers" of soil to use to start seedlings. I'd never heard of them before. Margaret found hers at Walmart. I found mine over at Canadian Tire. From the looks of them, they are exactly the same.

To get started, all you have to do is place the pellets in a pan of warm water. They instantly swell into small bundles of rich soil contained in a fine mesh, so there is no mess.

There's an opening on the top to insert a seed in each rehydrated pellet. To make the insertion a bit easier, I poked each one with a pencil. Once the seed was inside, I squeezed the top and it was covered with a bit of the soil, ready for sprouting.

I used egg cartons to hold my peat pellets. The cardboard helps hold moisture around them without keeping them too wet. Now all I have to do is wait (that's always the hardest part). But I will be rewarded with beans, peas, tomatoes, zucchini and corn to plant in my garden later this spring. I'll keep you posted on the progress.

Today we are heading back up the lake. While I'm there I'll finish my garden planting. Check back next week to see what's been happening. -- Margy

Wednesday, April 08, 2009

Ancient Sea Water Trapped in Powell Lake

One of our favorite places in the world is Powell Lake, BC. We love it so much we have a home floating on it's surface, a float cabin. While seeking information about Powell Lake, we discovered the results of an oceanographic study conducted by the University of British Columbia in 1962 and 1972. In 1990, the ancient sea water in Powell Lake became part of a doctoral dissertation in oceanography by Karen Anne Perry. Oceanographic?

Powell Lake is one of the deepest lakes in BC with a recorded depth of 1,180 feet. It was created when glaciers scoured out its fjord shaped basin.

If you travel up any of the inlets along the British Columbia coast, they look virtually the same as Powell Lake. The difference is they are filled with ocean water. In the case of Powell Lake, after the glaciers retreated the surrounding land rose and sea water became trapped. Over the years, fresh water increased the depth of the lake, but did not mix completely with the heavier salt water at the bottom. At least, that was the hypothesis.

What was discovered at the bottom of Powell Lake in 1962 was the oldest, about 10,000 years, trapped sea water to date. The water started becoming salty at about 400 feet and at the deepest levels was found to contain methane and hydrogen sulphide, which gives it a distinctive rotten egg odor. It contained no oxygen or life other than possible bacteria. This information sparked our imagination.

First we tried to think of a way to built a deep water sample apparatus of our own. In the end, we went to a friend and borrowed a Kemmerer bottle designed for such a task. On October 21, 2006, Wayne and I conducted our own deep water drop (1,100 feet) in Powell Lake. We were so excited when we opened the Kemmerer bottle and discovered our own 10,000 year old water.

Yes, it was yellow and smelled of rotten eggs. We don't have the ability to conduct a chemical analysis, but a friend is helping with that as well. You just never know where your imagination can lead you. In our case, it led us back 10,000 years.

Want more information about the drop? Read Up the Strait, the newest book in the Coastal BC Stories series by Wayne J. Lutz. It is available at www.PowellRiverBooks.com. -- Margy

Saturday, April 04, 2009

There's nothing like that new ferry smell!

Wayne and I travel frequently between our home in Powell River, BC, and my mother's place in Bellingham, Washington. When we are alone, we usually travel by Pacific Coastal Airlines and the Quick Shuttle bus. But when Mom comes for a visit, we drive and take the ferries.

Today's trip included a ride on the new ferry for the Earls Cove to Saltery Bay route. Not only is it a new ferry for the route, it was a brand new ferry. The Island Sky is a 102-metre intermediate-class ferry that was built at the Vancouver and Victoria Shipyards. She holds 600 passengers and 125 vehicles.

The Island Sky began service on February 19, 2009, but today was our first chance to take a ride. And oh, there's nothing like that new ferry smell. There's a large and well appointed elevator if needed, and wide stairwells to get from the car deck to the passenger lounge. Or head on up to the sundeck for some fresh air, magnificent views and photographic opportunities.

The ship has a Coastal Express with a small gift shop and snack bar. Seating includes one section of tables and chairs, and the rest of the passenger area has comfortable chairs, all with great ocean and mountain views.

Bertha (Mom's big Buick) enjoyed her ride on the car deck. There are two lanes tall enough for semi-trucks and double-decker lanes for extra cars on each side. One thing I don't like about the new design is the open bow and stern. During stormy weather it won't be very pleasant. But on a warm, sunny, spring day like today, it's fine. I invite you to come ride our new ferry and visit my home town, Powell River, BC. -- Margy

Friday, April 03, 2009

Lopez Island Landings

This time of year, when the sky turns blue, you need to take to the air. We headed for the airport and got 997 out of her hanger. She was excited about another chance to head out and explore Washington's nearby San Juan Islands. It isn't good for pilots or airplanes to sit on the ground too long. Both can get "rusty."

We've flown over Lopez Island several times, and last month Wayne made a reconnaissance visit. Today, we both returned for a hike and dinner. Most people arrive on Lopez by Washington State Ferry or boat, but you can also arrive by air. If you have a plane of your own, you can land at the 2904' runway at the Lopez Island Airport (S31). It is carved out of the trees, so be sure to watch density altitude and winds. You can also arrive by air using Kenmore Air from the Seattle area or San Juan Airlines from Bellingham or Anacortes.

Lopez is the most rural of the San Juan Islands. Leaving the airport, you walk by pastures dotted with cows. This time of year, they are shared by very vocal Canadian Geese. Forested areas shade your walk until you head downhill to Fisherman Bay. Because there are no taxis on Lopez, we needed to walk.

We opted to stop at the Galley Restaurant on the bay rather than walk all the way into Lopez Village (about 4 miles). If you're not flying out the same day, they have a great pub with entertainment. We had the crab wonton appetizer and the special of the day, a seafood rich Coquille St. Jacques. Everything was superb. The 2 mile walk is a little harder on the way back, but the hills aren't too bad. Be sure to wear comfortable shoes!

If you plan to stay the night, there's a motel and several bed and breakfasts. Lopez Village is the hub of activity, but the rural nature draws you away to enjoy it's parks and vistas. Summer is busy and crowded. But why don't you try it like we did on a warm Spring day. -- Margy